Soap — the magical rectangle that turns “I just changed my car’s oil” hands into “I can safely eat this sandwich” hands. Seriously, what did people do before soap was invented? Just wipe their hands on the grass and call it a day? Maybe that’s why everyone got the plague.
Now, I know what you’re thinking. “Why make soap when I can just buy it from the store?” Why bake bread when you can buy it pre-sliced, right? But where’s the fun in that? There’s something deeply satisfying about creating something with your own two hands — something you can use to then wash those hands. It’s a circle of cleanliness, my friends.
The Must-Have Ingredients
Sure, you could make soap with whatever you find under your sink, but for the love of all that is sanitary, please don’t. Instead, gather the following:
- Lye (Sodium Hydroxide) – About 4-5 oz (115-140g) – Don’t let the chemical name scare you; it’s as essential to soap as love is to a Nicholas Sparks novel.
- Water – Roughly 10-12 oz (300-350 ml) – If you don’t have this, you may have bigger problems than your need for soap.
- Oils/Fats – A whopping 28 oz (800g) – Olive oil, coconut oil, bacon grease — whatever you’ve got. Well, maybe not the bacon grease.
- Essential Oils – 0.5-1 oz (15-30 ml) – For that ‘freshly squeezed lemon’ or ‘lavender field’ scent you’ll never actually find in nature.
- Colorants – A teaspoon – Because we want our soap to scream, “I’m unique, just like everyone else!”
Safety First, Kids
We’re dealing with lye here, a substance that loves to react. It’s the drama queen of the chemical world. Wear gloves and safety goggles unless you’re trying to win a Darwin Award. Also, work in a well-ventilated area — this is not the time to discover you’ve lost your sense of smell.
Step 1: Don Your Armor
Before doing anything, put on your gloves and goggles. If you don’t own these, you can also wrap yourself in plastic wrap and squint really hard. (Just kidding, buy the darn gloves and goggles.)
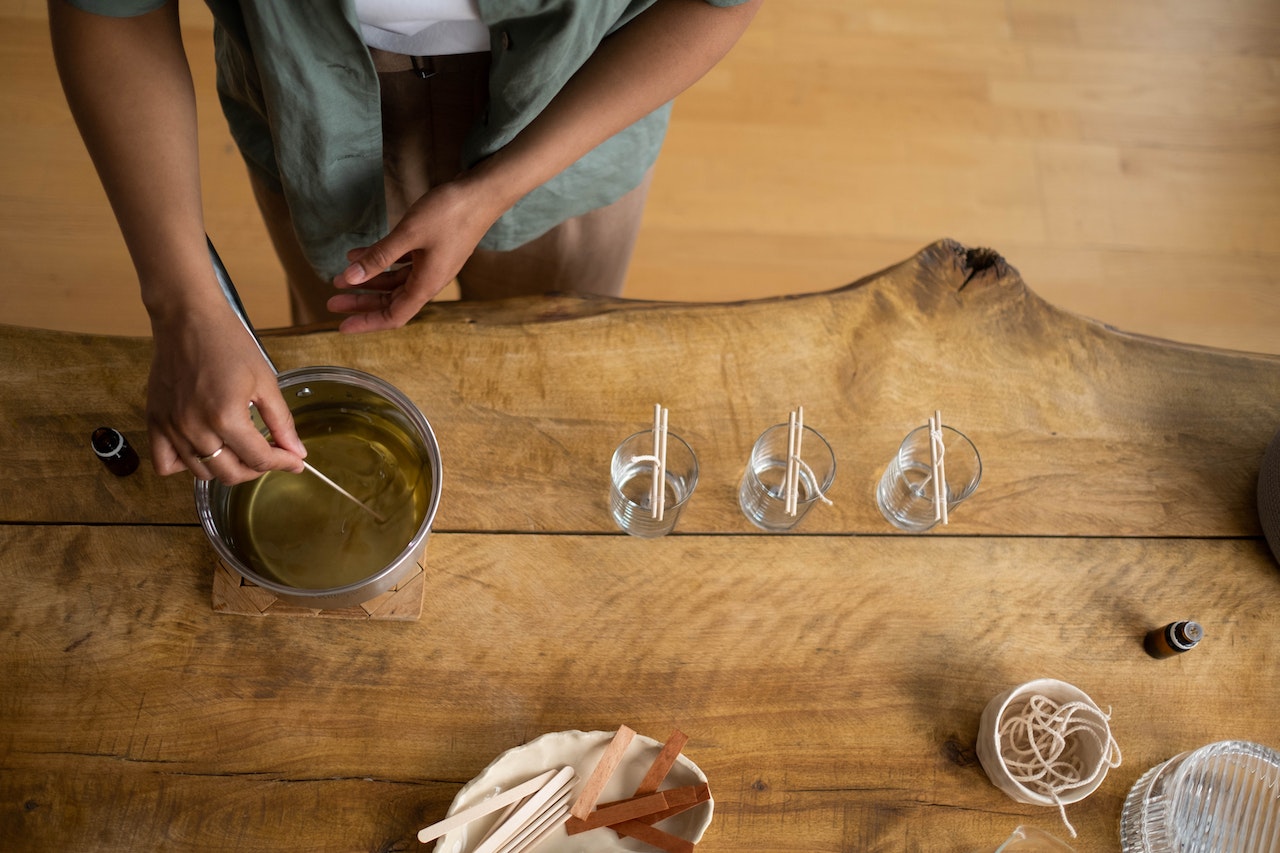
Step 2: The Lye-Water Tango
Remember, always add the lye to the water, not the other way around. Otherwise, you might create a mini-volcano in your kitchen, and not the fun kind with baking soda and vinegar. Slowly sprinkle the lye into the water while stirring. The mixture will get hot — kind of like your mixtape, but actually dangerous. Let it cool down to about 100-110°F (38-43°C).
Step 3: Warm Up the Fats
In another pot, melt your chosen oils or fats until they reach a similar temperature to your lye-water mixture. We’re trying to set up a blind date between these two, and it’s best if they have something in common, like their temperature.
Step 4: Mix & Match
Pour the lye-water into the oils. Stir like your life depends on it — or like you’re a barista trying to mix that last stubborn clump of matcha. When the mixture reaches a pudding-like consistency (referred to by fancy folks as “trace”), it’s ready for the next step.
Step 5: Scent-sational Choices
Now, this is the fun part where you get to feel like a mad scientist, but a good-smelling one. Add your choice of essential oils into the mixture. Maybe you want to smell like a lavender field or like you’ve rolled in a bed of oranges. You can also mix and match scents for more complexity. Just make sure you don’t go overboard, or you’ll end up smelling like a Yankee Candle store on Black Friday.
Here are five suggestions, each with its own flair and nostril-pleasing properties:
- Lavender Essential Oil – The vanilla ice cream of essential oils. It’s popular for a reason: calming, soothing, and makes you feel like you’re skipping through a purple field in slow motion. Great for bedtime soaps and existential life crises.
- Tea Tree Essential Oil – If your skin has more ups and downs than a roller coaster, tea tree is your guy. Known for its anti-bacterial and anti-fungal properties, it’s the superhero of essential oils. Note: it has a strong scent, so use sparingly unless you want to smell like a health food store.
- Lemongrass Essential Oil – Perfect for mornings, this zesty aroma is like caffeine for your nose. It’s uplifting and invigorating, sort of like finding a forgotten $20 bill in your jeans.
- Eucalyptus Essential Oil – Want to feel like you’re in a luxury spa or just really fond of koalas? Eucalyptus has a refreshing and slightly medicinal scent that opens up your airways and your third eye… or so they say.
- Peppermint Essential Oil – The candy cane of the essential oil world. It’s cooling, invigorating, and makes you feel like it’s Christmas morning every time you wash your hands.
Remember, essential oils are potent. About 0.5-1 oz (15-30 ml) should do the trick.
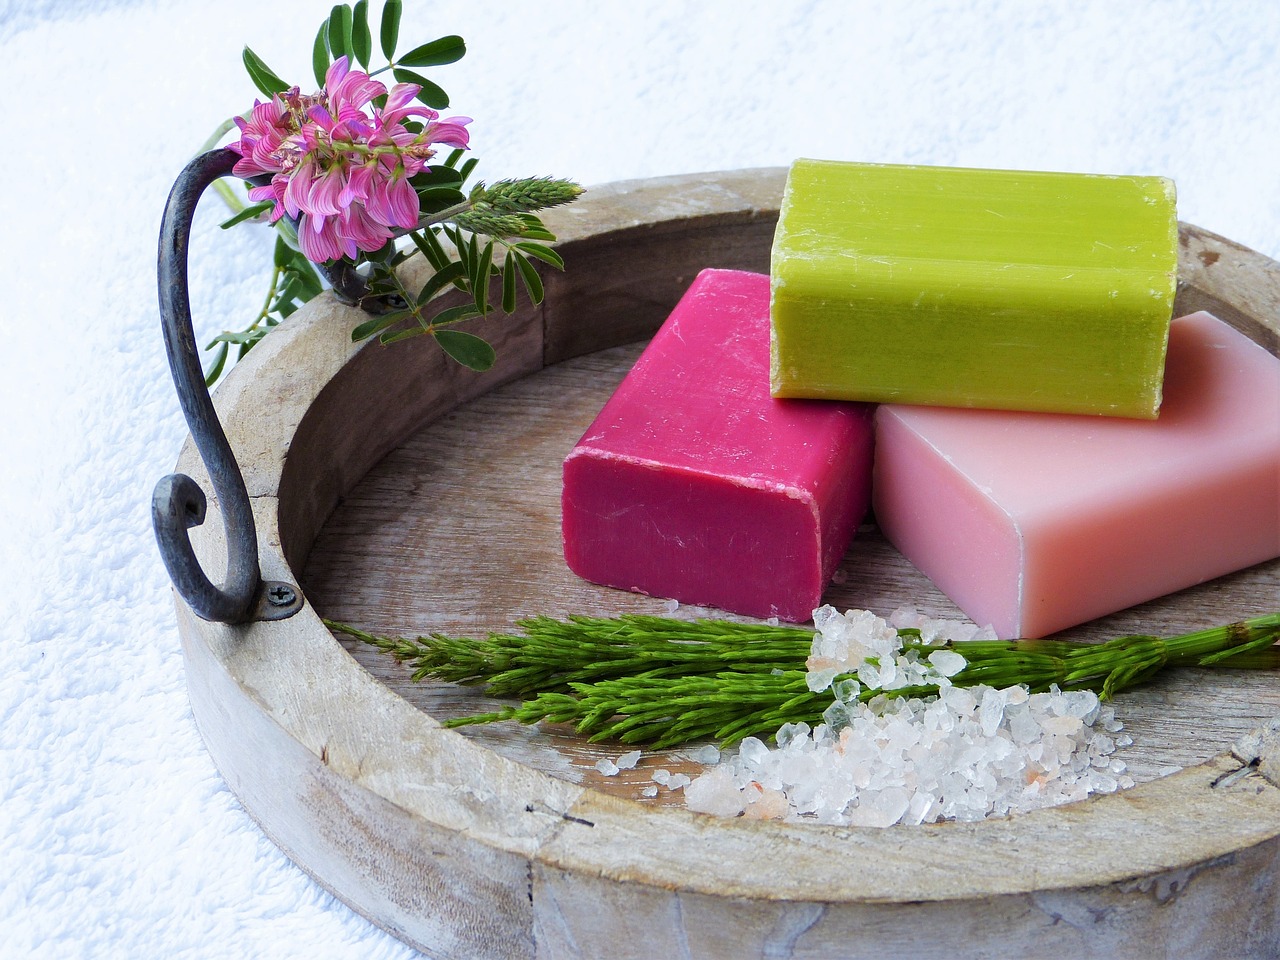
Step 6: Color Me Impressed
If you want to add some aesthetic flair to your soap, now’s the time to introduce colorants. Think of it like choosing a filter for your Instagram selfie; it doesn’t have to be natural to look good. Be aware that some colorants can affect your skin, so opt for skin-safe dyes or natural options like turmeric for yellow or spirulina for green. And for Pete’s sake, mix it thoroughly. Nobody wants a soap that looks like a bad tie-dye job.
Here are five colorants to make your soap as eye-catching as a double rainbow:
- Activated Charcoal – For the soap that’s going through its emo phase. It gives you a sleek, black color and also has detoxifying properties. Just don’t mistake it for a snack; it’s not that kind of charcoal.
- Turmeric Powder – A sprinkle of this will give your soap a golden glow, like it just returned from a yoga retreat in Bali. Bonus: Turmeric has anti-inflammatory properties.
- Spirulina Powder – Want to pretend you’re washing your hands with mermaid tears? This all-natural green is for you. It’s like an underwater treasure without the sunken pirate ship.
- Beetroot Powder – For when you want your soap to look like it could double as a Valentine’s Day gift. It adds a beautiful rosy red or pink, depending on how much you use. Just remember, unlike love, this color does fade over time.
- Cocoa Powder – Make your soap look like a chocolate bar, because why not? It gives a nice brown hue and smells divine, but remember, it’s still soap. Do not eat. I repeat, do not eat.
Remember to start with a small amount and add more until you achieve your desired color. These colorants can be potent, and you wouldn’t want your soap looking like it’s auditioning for a neon rave.
Step 7: The Mold Gold
Alright, you artsy Picasso, it’s time to pour your soon-to-be soap into a mold. Silicone molds work best because they’re easy to clean and you don’t have to grease them. Though, if you’re going for a rustic look, a greased-up old shoebox will do. I’m not here to judge; I’m just here to guide you through the magical realm of homemade cleanliness.
Step 8: The Waiting Game
Here comes the excruciating part: waiting for the soap to set. Cover your molds with a piece of cardboard and a towel to keep it warm, sort of like tucking in a child — except this child is a chemical cocktail that could burn your skin off if not handled properly. Let it sit for 24 to 48 hours.
Step 9: Unmold and Cut
So you’ve been patient, or you’ve forgotten about your soap-making endeavor and just now remembered — either way, it’s time to get your soap out of its mold. If all has gone well, it should pop out easily. Cut it into bars using a knife, guitar string, or your laser vision if you have it.
Step 10: The Curing
Place the soap on a parchment paper-lined tray and let it sit for another 4 to 6 weeks to cure. I know, I know, it’s like waiting for your bread to rise in a very slow-motion film, but patience is a virtue or something.
Final Thoughts
And voilà! You’ve successfully created your very own, 100% homemade soap. Sure, it might not have the same allure as those overpriced bars at artisanal markets, but it’s got something even better: your sweat and tears. Metaphorically, of course. Please don’t actually put your bodily fluids in the soap.
So the next time you lather up with your own homemade soap, take a moment to savor your DIY prowess. You’ve done it. You’ve conquered the art of saponification. Take that, store-bought cleanliness!
Now go wash your hands. You’ve earned it.