Ah, smoothies. The elixir of life for gym-goers, the go-to breakfast for those too busy to chew, and the ultimate pretense for people who want to pretend they’re healthy while essentially having ice cream for breakfast. Listen up, peasants, because I’m about to share the sacred, life-altering knowledge on how to make a smoothie. So gather ’round, put on your monocles, and prepare to be enlightened.
Step 1: Buy a Blender, You Caveman
First things first. If you’re thinking of making a smoothie with a fork, a spoon, or — God forbid — your bare hands, then you’re out of luck. Unless you’re Popeye with forearms bigger than your ego, you’ll need a blender. And not just any blender — a REAL blender, capable of spinning faster than your social life plummeted during the pandemic.
You could go for the average, run-of-the-mill blender that only asks for your dignity in return. Or, if you’re willing to remortgage your house, you could invest in a blender with more horsepower than a Ferrari and blades sharper than your wit. A blender that not only crushes ice but also your dreams of ever having enough kitchen counter space again.
Step 2: Ingredients, or the ‘Stuff You Throw In’
Once you’ve acquired this marvelous machine, it’s time to think about what you want to put in it. Don’t look at me like that; I mean ingredients for your smoothie. The possibilities are endless, ranging from fruits that even a botanist can’t pronounce to green stuff that may or may not be weeds from your garden.
The Basic Betty:
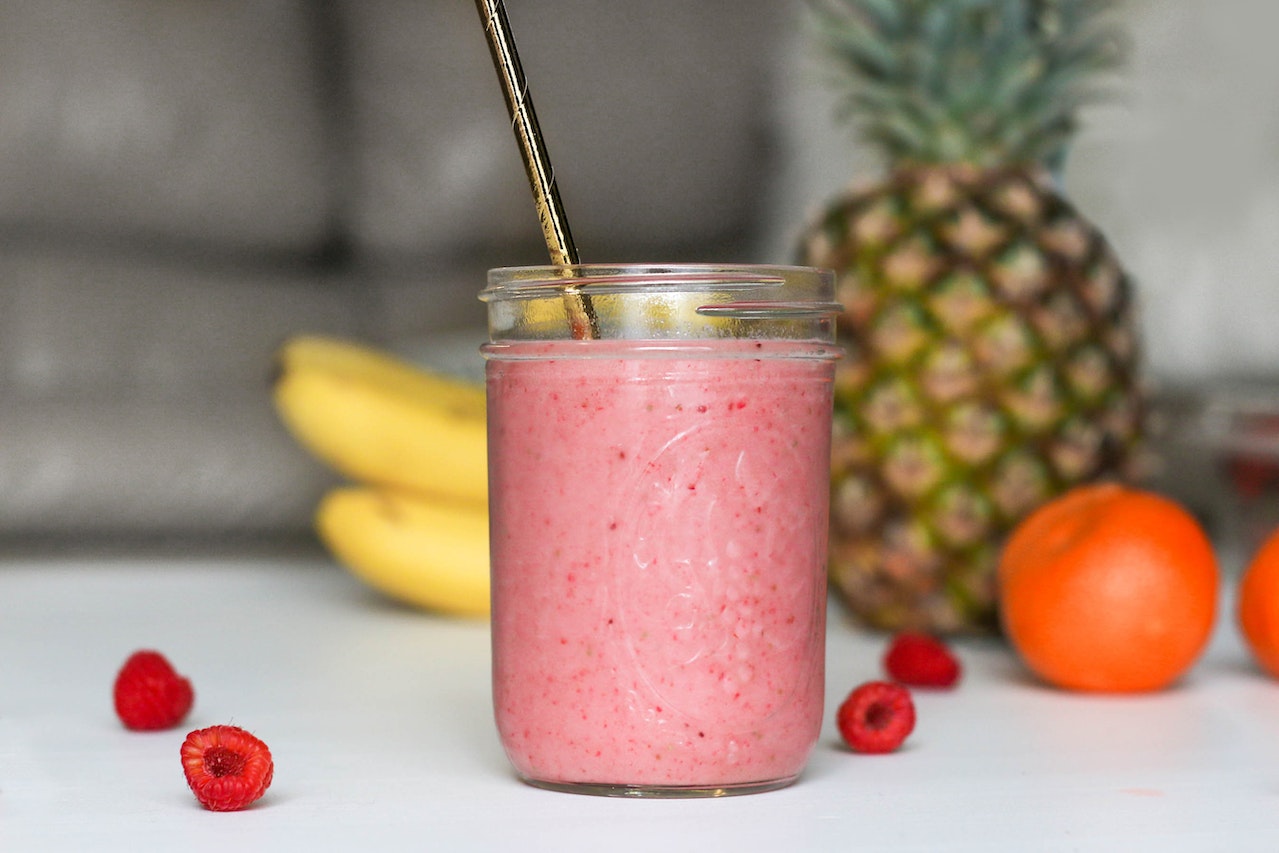
For all you basic souls out there, stick to classics like bananas, strawberries, and a splash of orange juice. Don’t be adventurous; we wouldn’t want you to break a sweat.
The Vegan Vixen:
Are you vegan and absolutely never talk about it? Go for almond milk, kale, and chia seeds. Just don’t forget to film it for your Vlog; otherwise, it never happened.
The Lazy Lenny:
If you can’t be bothered to go grocery shopping, just use whatever is left in your fridge. Half a grape, two-week-old milk, and that sad slice of lemon could potentially make an unforgettable smoothie. Or a trip to the emergency room. Either way, it’s an experience.
The Protein Paul:
For the gym rats who consider whey protein a primary food group, this one’s for you. Go ahead and add two scoops of protein powder to your spinach and banana. And sure, go ahead and top it with a dollop of peanut butter. The more it tastes like dessert, the less guilty you’ll feel about skipping leg day…again.
The Hipster Henry:
You wouldn’t use any ingredients that aren’t ethically sourced, organic, and in season, would you? Tsk-tsk. This smoothie calls for açaí berries (which you pronounce perfectly), oat milk, and a spoonful of that organic, non-GMO, vegan, locally-sourced, cruelty-free, small-batch artisanal honey you paid $20 for. Garnish with a sprig of mint you grew in your window garden.
The Sweet Tooth Sally:
Why have a dessert when you can drink one? Load your blender with all the stuff that’s supposed to be bad for you — chocolate chips, ice cream, a cookie (or two) — and blend away. Throw in a strawberry to pretend it’s nutritious. Once blended, serve in a tall glass with a side of denial.
The Overachieving Olivia:
You don’t just make smoothies; you craft liquid masterpieces. Acai berry base, spirulina for that vibrant green color, dragon fruit for Instagram appeal, and edible gold flakes on top. Because you’re not just making a smoothie, you’re making art. Oh, and you do all this while running a marathon on your at-home treadmill.
The Experimental Eddie:
Why stick to conventional ingredients like fruits and milk when you can get creative? Try blending a slice of pizza, some buffalo wings, and top it off with a sprinkle of garlic powder. We can’t guarantee it will taste good, but we can guarantee that no one will ever forget it.
The Health Nut Holly:
Superfoods? More like “stuff this entire blender with everything that Dr. Oz ever mentioned.” Goji berries, spirulina, flax seeds, turmeric, matcha, and probably some organic soil for good measure. Your smoothie doesn’t just give you nutrients; it practically confers superpowers.
The Indecisive Ian:
Can’t decide what kind of smoothie you want? Why not all of them? Add a bit of everything from each category above. Will it taste good? Who knows. Will it be interesting? Absolutely.
Step 3: Measure with Precision (Or Don’t, Who Cares?)
Ah, measurements, the bane of spontaneity. Some folks swear by measuring cups, tablespoons, and the phase of the moon to get the ‘perfect smoothie’. But let’s be honest: we’re making a drink, not launching a rocket to Mars. Throw caution to the wind, and let your inner rebel shine! Take handfuls of whatever you want and chuck it in. If it ends up too thick, call it a “smoothie bowl” and eat it with a spoon. Too thin? Congrats, you’ve just made yourself an artisanal, cold-pressed juice cleanse. Act like it was intentional.
Step 4: The Art of Blending, or “How to Hit a Button”
Now that you’ve committed to your ingredient list — be it simple, extravagant, or borderline hazardous—it’s time to blend. You’d think this would be straightforward, but oh no, you naive little cherub, there’s an art to it. Place the softest ingredients at the bottom and the toughest ones at the top. This isn’t just kitchen feng shui; it actually helps your blender not to have a mechanical breakdown halfway through.
Once your blender is packed tighter than your jeans after Thanksgiving dinner, put the lid on. Yes, the lid. If you forget this crucial step, you won’t have a smoothie; you’ll have an abstract painting splattered all over your kitchen walls. If that’s what you’re going for, then by all means, let your creativity flow — literally.
Press the button. Any button. “Blend,” “Pulse,” “Eviscerate,” whatever your model features. Hold your breath, say a prayer, and let the magic happen. Your blender will roar to life, making you wonder if you should have worn hearing protection. After what seems like an eternity (but is really just 30 to 60 seconds), your lumpy pile of food scraps will have transformed into a…well, a less lumpy liquid pile of food scraps.
Step 5: The Taste Test, or “Moment of Truth”
Now comes the nerve-wracking taste test. You’re faced with two options: either bravely sample the concoction yourself or dupe an unsuspecting family member into being your guinea pig. Should you go for the latter, just remember that holiday dinners could forevermore be awkward.
If you’re brave enough to try it yourself, take a small sip. Does it taste like a tropical paradise, or more like you licked a lawnmower? If it’s the former, congratulations! Bottle it up and Instagram that beauty ASAP! If it’s the latter, well, that’s what sugar is for. Or vodka. Pick your poison.
Step 6: Garnish, Because We’re Fancy
Now that you have a glass of blended… something, it’s time to make it look like the high-class beverage you pretended it would be. Throw a tiny umbrella on top, stick a slice of pineapple on the rim, or just sprinkle some chia seeds for a faux-health halo. No one has to know you’re really drinking what’s essentially a melted popsicle.
Step 7: Document Your Accomplishment
Did you even make a smoothie if you don’t post it online? No one’s life will be complete until they see your blender masterpiece, so do the world a favor and make it Instagram official. Choose a filter that screams “I’m healthy, and I want everyone to know it!” and slap on hashtags like #SmoothieLife #BlenderGenius or #BetterThanKale.
Conclusion: The End, or Just the Beginning?
Congratulations, you’ve now mastered the utterly complex and mentally draining task of making a smoothie. You can join the ranks of the ‘smoothie elite,’ an exclusive club that no one really talks about, but everyone is secretly jealous of.
Until next time, happy blending, and may your smoothies be ever in your favor.


