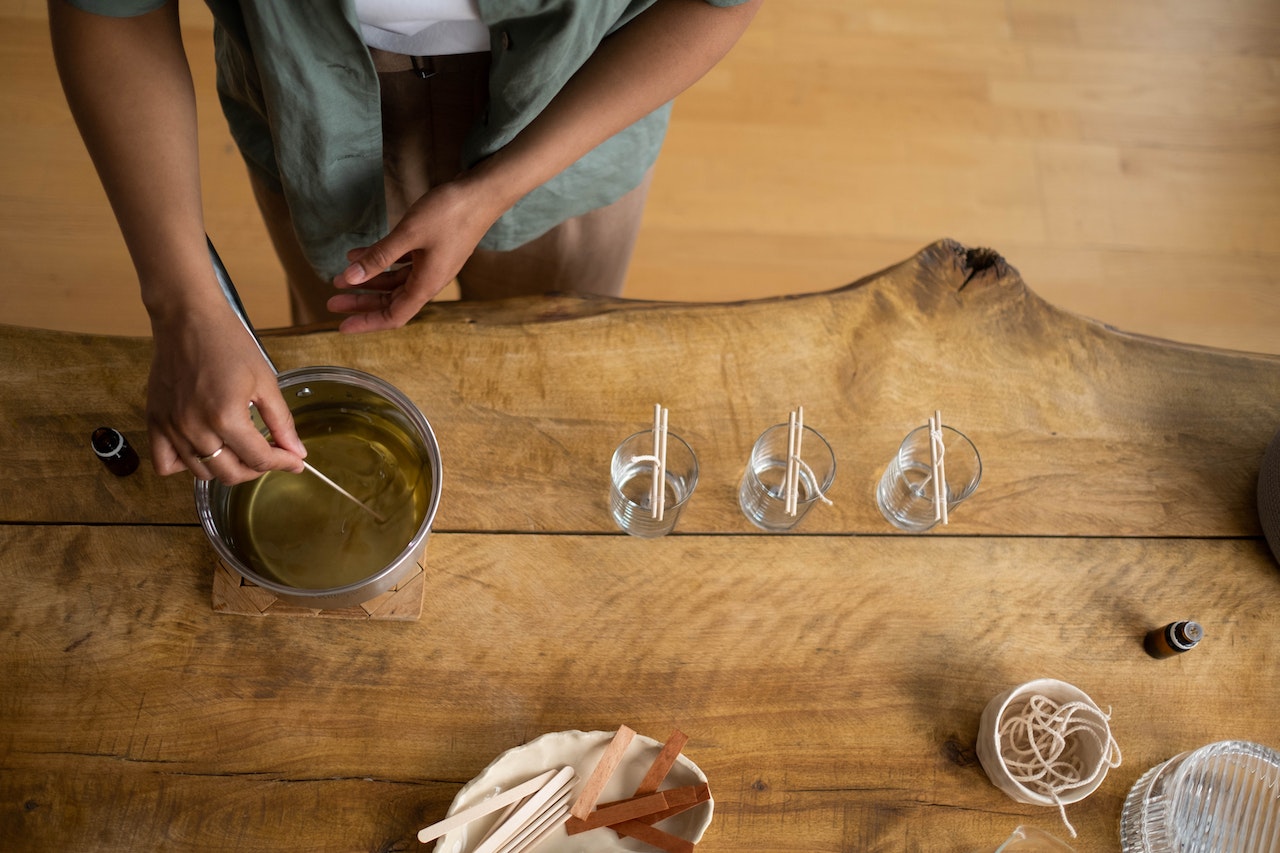
So, you’ve found yourself with some free time and want to dabble in the ancient art of candle-making? Ah yes, because clearly, you’ve mastered sourdough bread, crocheting, and social distancing, so why not add something else to your pandemic-driven DIY list? After all, what could possibly go wrong when you’re working with hot wax and fire?
Before you embark on your journey to becoming the Michelangelo of candles, it’s crucial to remember this isn’t just a hobby; it’s an existential quest to discover just how skilled — or unskilled — you truly are. Prepare to laugh, cry, and question your life decisions as we navigate the flaming labyrinth that is candle-making.
Step 1: Gather Your Supplies
First things first, you’ll need some supplies. It’s cute that you thought you could just melt some crayons and call it a day. Ah, to be so naive. In reality, you’ll need the following:
- Wax: You can’t just use any wax. Beeswax, soy wax, paraffin wax, left-over candle stubs from your last seance — choose your fighter.
- Wicks: Otherwise known as “the thing that makes the candle a candle and not just a sad lump of wax.”
- Containers: No, your old Tupperware won’t cut it. Unless, of course, you want a melted plastic bonanza. Go for glass or metal containers, you maverick.
- Dyes and Fragrances: Because even if your candle looks like a Pinterest fail, at least it should smell good.
- A Double Boiler: Just accept that your kitchen will temporarily transform into a high-school chemistry lab.
Step 2: Prepare Your Workspace
By this, I mean clear your kitchen of all evidence that you ever attempted to cook, because let’s face it, no one needs to see that disaster. Make sure to put down some newspaper or a silicone mat unless you want wax splatters to become a permanent fixture in your interior design.
Step 3: Safety First, Kids
Despite its tranquil, Zen facade, candle-making is not without its perils. Safety glasses? Check. Fire extinguisher? Check. Updated will? Check. Got a buddy who can call 911 when you inevitably mess something up? Double-check.
Step 4: Melt the Wax, Not Your Dreams
Alright, hotshot, it’s time to melt some wax. If you’ve ever melted chocolate, this should be a piece of cake. If you haven’t, oh boy, are you in for a wild ride. Set up your double boiler and place your chosen wax inside. Keep the heat on low, and whatever you do, don’t walk away. It’s like a toddler: turn your back for one second, and it’s everywhere.
Step 5: Stir, Don’t Shake
While the wax is melting, it’s essential to stir it occasionally, so it doesn’t feel neglected. This is also a good time to add your dye and fragrance, preferably without dumping the entire bottle in. Unless, of course, you enjoy being overwhelmed by the scent of “Ocean Breeze” for the next six months.
Step 6: Secure the Wick, Save Your Soul
Now that you’ve got your melted wax, it’s time to prep your containers. Place your wick in the center of the container and secure it with a pencil or chopstick laid across the top. If it’s more crooked than a politician, you’re doing it wrong. Fix it unless you enjoy lopsided candles that burn unevenly and mock you silently from your coffee table.
Step 7: Pour One Out (the Wax, That Is)
Assuming you’ve reached this stage without any injuries, heartbreak, or existential crises, it’s time to get that molten wax into your container. Hold your breath, steady your hand, and pour like you’ve never poured before — right into the container, and not all over your counter. Ah, the beauty of a fresh, unruined candle, sitting there like the shiny trophy of your questionable life choices.
Step 8: Exercise Patience (Yes, We Know It’s Hard)
Here’s the trickiest part: waiting. As the saying goes, a watched pot never boils, and a watched candle never hardens. In other words, go find something else to do. Binge-watch a show, stalk your ex on social media, or call your mom to let her know you’re making candles now because you’re a fully functional adult. Just don’t touch the candle. Let it solidify in peace.
Step 9: The Final Touches
Ah, so you couldn’t help but peek and you’ve noticed the candle has finally hardened. It’s time to snip that wick down to size — about a quarter inch should do. If you’ve been adventurous and used dye or scents, this is also the time you discover whether your candle will smell like lavender or resemble a weird hybrid between old socks and a car freshener.
Step 10: Light ‘Em Up (Responsibly)
Well, you’ve done it. Against all odds, you’ve made a candle. It’s not just any candle; it’s your candle. This is your moment. Light that wick, and watch as your DIY masterpiece comes to life. Just remember, the fire alarm is not a candle timer, and smoke signals are generally considered a bad sign in modern home decor.
Troubleshooting Tips, Because Let’s Face It, You Might Need Them:
- Lopsided Wick: If your wick is more skewed than a politician’s promises, re-center it while the wax is still molten.
- Candle Tunneling: This is when your candle burns down the middle but not the sides. Fix it by allowing your candle to burn longer next time, or put a tin foil hat on it to help even out the melting. No, the foil hat won’t make your candle a conspiracy theorist.
- Smell Doesn’t Match Expectations: If you were aiming for fresh roses and ended up with a musty basement, try different fragrances or combinations thereof. Remember, practice makes less terrible.
Scent-sational Choices:
When it comes to fragrances for candle-making, the options are as limitless as your imagination, or perhaps, your ability to sniff out a good combination. Here are some popular fragrances and unique blends that can take your candle from “meh” to “mmm”:
Solo Scents:
- Lavender: Calming and universally loved, it’s the vanilla ice cream of the candle world.
- Vanilla: Speaking of which, this scent adds warmth and sweetness to any room.
- Sandalwood: For that mysterious, earthy, man-cave aura.
- Lemon: Zesty and clean — like your house after the cleaning service comes.
- Rose: Classic and floral, this scent has Sunday brunch vibes.
- Cinnamon: Smells like Christmas, or maybe a failed attempt at homemade cinnamon rolls.
- Ocean Breeze: Brings the beach to you, minus the sand in uncomfortable places.
- Jasmine: Light, sweet, and subtly romantic.
- Pine: Great during the holidays or for fooling guests into thinking you live near a forest.
- Coffee: Because who doesn’t want their house to smell like a Starbucks?
Scent Combinations:
- Lavender & Vanilla: For when you can’t decide between smelling like a spa or a bakery.
- Sandalwood & Citrus: Earth meets zest in this invigorating combo.
- Rose & Bergamot: Romantic, floral, and a little bit fruity.
- Mint & Lemon: Ideal for that “my home is cleaner than yours” aroma.
- Pine & Cinnamon: Christmas in a candle, or maybe just a fancy potpourri.
- Coconut & Lime: The closest you’ll get to a tropical vacation this year.
- Coffee & Chocolate: Mornings encapsulated. Caution: may induce cravings.
- Apple & Cinnamon: Another holiday classic, good for anytime you’re pretending your home is a cozy B&B.
- Ginger & Peach: Zesty and sweet, perfect for a summer evening or pretending it’s summer.
- Patchouli & Orange: An intriguing blend that’s a little bit hippie and a little bit fresh.
Remember, scent is subjective. One person’s heavenly lavender is another person’s “why does it smell like grandma’s house in here?” Always do a sniff test before committing to a large batch.
In Conclusion:
You’ve taken a riveting, humbling journey through the world of candle-making. By now, you should be fully prepared to either start your own Etsy store or accept a lifetime ban from handling wax ever again. Whatever the outcome, just remember: like any form of art, the beauty of your candle lies in the eye of the beholder. Even if that beholder is just your cat.
There you have it. How to make candles and question your life choices, all in one go. You’re welcome, future candle connoisseur. Now go set the world on fire. Figuratively, please.


