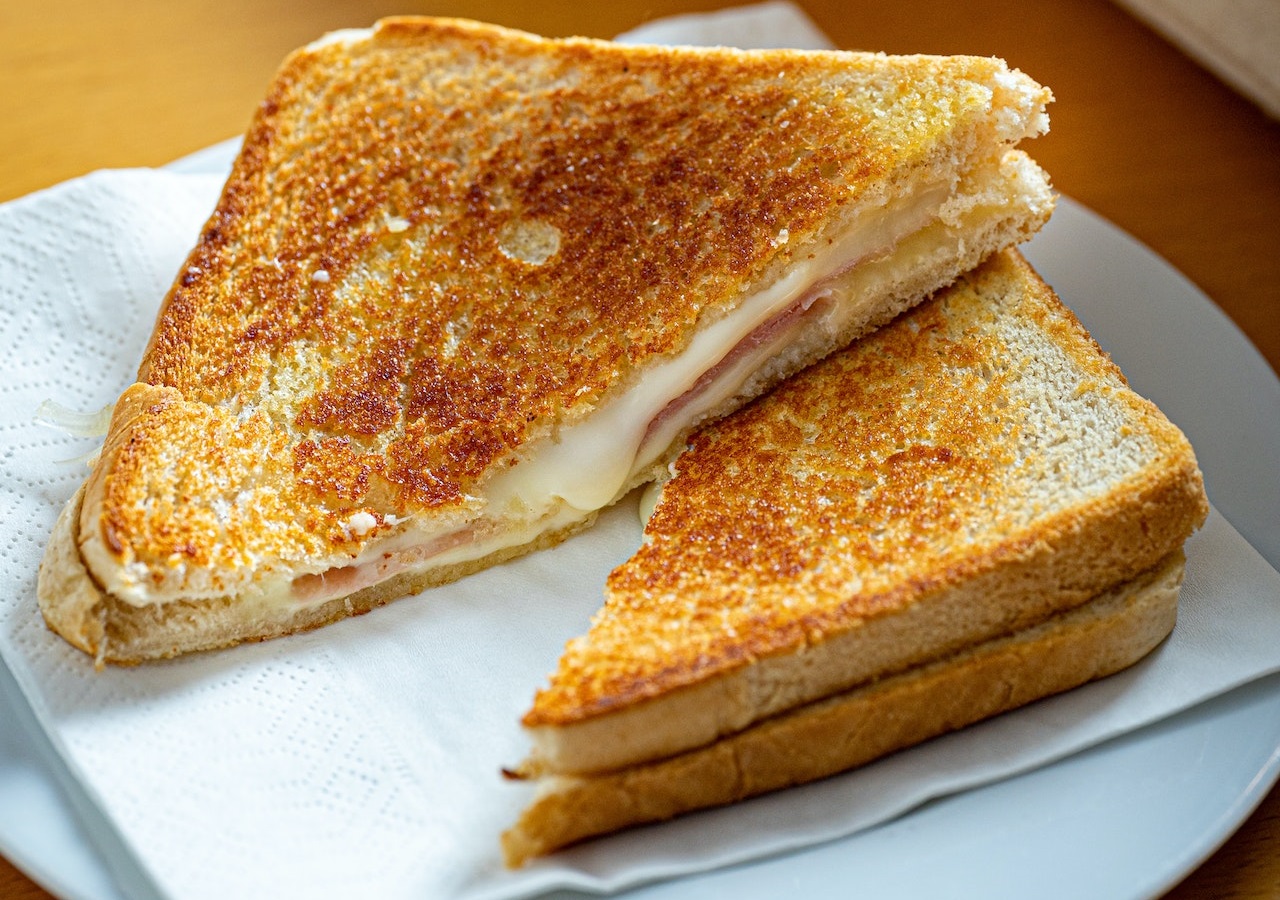
The grilled cheese sandwich. It’s the culinary equivalent of a hug from your grandma – warm, comforting, and occasionally a little oily. But, dear reader, did you know that making this seemingly simple delicacy requires the dexterity of a cat burglar, the precision of a Swiss watch, and the unwavering dedication of a monk transcribing sacred texts?
Well, not really. But let’s pretend for a moment, shall we?
Ingredients You’ll ‘Absolutely’ Need:
- Bread: Two slices of the most organic, gluten-free, hand-massaged, sunbathed, whispered-to-at-night kind of bread. Or, you know, whatever’s been forgotten at the back of your cupboard for a week.
- Cheese: Approximately 2 ounces (or 56.7 grams, because precision matters!) of cheese that screams “I am expensive!” – like Gruyère, aged Cheddar, or Unicorn Tears Cheese. Alternatively, those plastic-wrapped singles will do. We’re not judging. Much.
- Butter: About 2 tablespoons of butter churned by vestal virgins under a full moon. Or, margarine. We’re flexible like that.
- Optional Luxuries: Tomato slices, onions, or perhaps a sprinkle of existential dread. Because who doesn’t want to question their life choices while biting into gooey melted cheese?
Alright, now that we have our oh-so-exotic ingredients, let’s dive into the ocean of cheese-making wisdom.
The Sacred Steps of Cheese-Grilling Mastery:
- Choose Your Weapon: And by weapon, I mean skillet or frying pan. Ensure it has heard tales of its ancestors, knows its purpose, and is ready for the legendary battle with cheese and bread. If it’s non-stick, even better, but we all know that life isn’t always that easy.
- Butter: It’s Not Just a Spread, It’s an Art: Slather one side of each bread slice with your moon-churned butter. This will ensure a golden crispy exterior. Or it might just prevent your sandwich from morphing into the pan like a superhero’s origin story. Either way, butter it up!
- Assembly is Key: Place the bread (buttered side down, Einstein) onto a plate, and then pile on your cheese. Feeling fancy? Add those optional luxuries we spoke about earlier. Now, unless you’re aiming to create a culinary disaster or modern art, cap off this cheesy mountain with the other slice of bread, butter side facing the heavens.
The (Not-So) Mysterious Grilling Process:
- Fry-pan, Meet Sandwich: Preheat your chosen weapon — I mean, pan — over medium heat. Test its readiness by sprinkling a few drops of water onto it. If they dance and evaporate, your pan is probably thinking, “I’m ready! Bring on the cheese!” Place your sandwich into the pan, and listen to the symphony of sizzling. That’s the sound of magic…or just butter melting.
- The Waiting Game: Cooking is 50% skill, 25% luck, and 25% staring intently at food wondering if it’s doing what it’s supposed to. Cook the sandwich for about 3-4 minutes on each side, or until it’s golden brown. Or a little black if you got lost in thoughts about whether unicorns really cry cheese.
- The Great Flip: Armed with a spatula (or just your superhero reflexes), flip your sandwich. This is the moment. Do it with confidence, style, and a little panache. If you mess up, just remember that a messed-up grilled cheese is still, well, cheese. And that can’t be too bad, right?
- Is it…Done Yet? After the flip, your sandwich requires another 3-4 minutes to transform into its crispy golden self on the other side. Pro tip: Press down lightly with your spatula to ensure an even crispiness and to make your cheese reach peak meltiness.
- The Grand Finale: Once your grilled cheese looks like it’s been kissed by the golden sun and serenaded by the butter gods, it’s ready to leave the pan and start its next journey: the one to your plate (and soon after, your stomach).
The (Totally Optional) Fancy Extras:
- Cutting Your Masterpiece: You could go for the classic half or get all fancy with diagonals. Or, hey, use cookie cutters to make grilled cheese stars, hearts, or…unicorns. Because why not?
- Dipping Delight: Got some tomato soup lying around? Maybe some marinara sauce? These can elevate your sandwich from “Just Dinner” to “Gourmet Experience I’ll Probably Brag About Tomorrow.”
- Embrace the Afterglow: Sit back, admire your handiwork, and prepare to dive into cheesy nirvana. Bask in the glory of what you’ve created, and maybe, just maybe, share a bite with someone you deem worthy.
In conclusion, while some might say making a grilled cheese sandwich is child’s play, you now know it’s an art, a science, and a journey of self-discovery. So, the next time someone downplays your culinary prowess, raise your sandwich high and proclaim, “Behold, I am the Grilled Cheese Guru!” And then, maybe share a bite because, let’s be real, it’s too delicious not to.