Ah, quinoa (pronounced keen-wah for those who’ve been butchering it for years). That ancient grain that made its way from the Andes Mountains to the shelves of your local hipster grocery store and your Pinterest board. If you’ve ever wanted to elevate your dinner from “meh” to “mediocre,” you’re in the right place! Let’s dive deep into the riveting world of quinoa cooking. Trust me, it’s almost as exciting as watching paint dry, but with the added bonus of edibility.
Ingredients (because apparently you need them):
- 1 cup of uncooked quinoa (Yes, only one cup. But if you’re feeling rebellious, who am I to stop you?)
- 2 cups of water (or tears, depending on how your day’s been)
- A pinch of salt (optional, like your commitment to actually following this recipe)
- Some pretentiousness for flavor
Step 1: Choose Your Quinoa
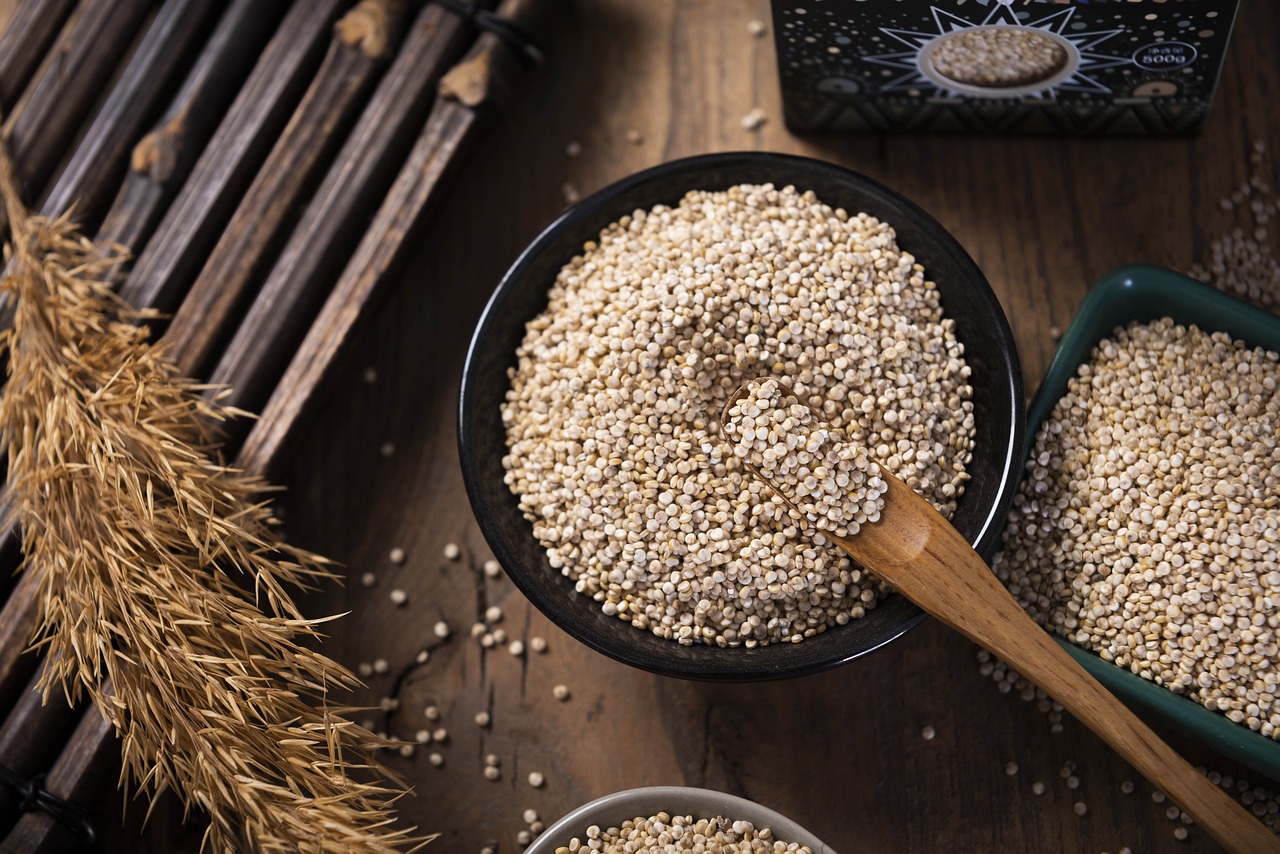
Before you even think about cooking, you’ve got to get your hands on some quinoa. There are different types – white, red, black, tri-color, and… that’s about it. I know, overwhelming choices, right? White quinoa is the most common and has a light flavor. Red and black have a bit more “oomph” to them. And tri-color? Well, that’s just showing off. But, for simplicity’s sake (and because I don’t trust you with too many choices), let’s just stick with the white one.
Step 2: Rinsing – The Step You’ll Probably Skip
Quinoa comes with a natural coating called saponin. This makes it taste a bit bitter and soapy. Unless you’re into that kind of thing, I’d advise you rinse it. Put the quinoa in a fine-mesh sieve and run cold water over it for a couple of minutes. Can’t find a sieve? Use your hands to shield the quinoa while letting the water run through – or just accept your fate and eat slightly bitter quinoa. Life’s full of tough choices.
Step 3: Water to Quinoa Ratio
Now, here comes the part that requires a little bit of math. Stay with me here. For every cup of quinoa, you need… wait for it… TWO cups of water! I know, groundbreaking stuff. If you’re not into ratios, just remember: quinoa is needy. It wants twice the attention (or water) as it gives.
Step 4: Boiling – It’s Getting Hot in Here
Pour your water (or tears) into a saucepan. Add the quinoa and a pinch of your optional commitment (salt). Then crank up the heat and bring this bad boy to a boil. This might take a while. Feel free to narrate the process in a dramatic voice, host an imaginary cooking show, or just stand there. I’m not the boss of you.
Step 5: Simmer Down Now
Once your quinoa concoction reaches a boil, you’ll want to lower the heat. Seriously, take it down a notch. Cover your pot with a lid, reduce the heat to low, and let it simmer for about 15 minutes. Just like a good soap opera, this step is filled with steam, suspense, and occasional bubbling drama.
Step 6: Are We There Yet?
After the longest 15 minutes of your life (okay, maybe not, but it’ll feel close), take a peek. The water should be absorbed, and the quinoa should look all fluffy and stuff. If it still looks like it’s having a pool party in there, give it a few more minutes. Patience, young grasshopper.
Step 7: The Fluffening
Turn off the heat, but let the quinoa sit there covered for about 5 more minutes. It’s like a mini spa day for the grains. Then, take a fork and fluff the quinoa. Yes, “fluff.” It’s a technical culinary term, I assure you. This will separate the grains and make it look like you actually know what you’re doing.
Step 8: Serve and Pretend
Now that your quinoa is all cooked and fluffed, transfer it to a bowl. Serve it as a side, throw it into a salad, or stare at it until you figure out what you actually want to do. Maybe sprinkle some chopped herbs or feta on top? Or just throw on whatever leftovers you have in your fridge. Quinoa is pretty non-judgmental.
Step 9: Revel in Your Accomplishment
Congratulations! You’ve successfully cooked quinoa. I know, it’s a momentous occasion. I’d recommend calling your parents to inform them of this achievement. While they might not understand the significance, deep down, you know you’ve climbed the Mount Everest of grains.
Some Parting Wisdom
Remember, quinoa is more than just a food trend or a tricky-to-pronounce word; it’s a grain packed with protein and fiber. So, not only did you entertain your taste buds with this thrilling culinary journey, but you also did something good for your body. And if anyone asks you how you became such a master of the quinoa universe, just wink and say, “It’s all in the fluffening.”
Now, go forth, armed with humor and culinary prowess, and spread the good word about quinoa!
Pro Tips for the Aspiring Quinoa Virtuoso:
- Stock Swap: Bored of water? Try cooking quinoa in vegetable or chicken broth. Not only will you impress your tastebuds, but you’ll also casually elevate your quinoa game to gourmet status.
- Toast Time: Before boiling, toast the quinoa in a dry skillet for 4-5 minutes. This little hack adds a delightful nutty flavor. It’s like sending your quinoa to a tanning salon.
- Refrigerator Rescuer: Quinoa lasts up to a week in the fridge, so if you make a big batch, you can use it in different recipes throughout the week. Or, you know, eat it every day and claim you’re on a “quinoa cleanse”.
- Breakfast Buddy: Think quinoa is just for lunch and dinner? Think again! Mix in some almond milk, honey, and fruits for a protein-packed breakfast porridge. It’s like oatmeal’s trendy cousin.
- Freeze Frame: Yep, you can freeze cooked quinoa! If you make too much (or purposely make extra for future laziness), just spread it out on a baking sheet, freeze, and then transfer to freezer bags. Next time you’re in a bind, defrost and enjoy. No one will know it was from last month’s cooking spree.
- Spice It Up: Basic is boring. Experiment with spices like cumin, turmeric, or even a sprinkle of paprika. Why let potatoes have all the fun?
- Liquid Love: Add a splash of lemon juice or a drizzle of olive oil after cooking. It adds a fresh zing and makes the quinoa even more irresistible. If that’s even possible.
- Avoid the Squish: If your quinoa is turning out too soft or mushy, reduce the water a tad. The perfect quinoa should have a slight bite to it. Like a friendly hamster.
- Salad Savior: Quinoa is perfect for salads! It soaks up dressings and flavors without getting soggy, ensuring your lunch remains as crisp as your wit.
- Mind the Time: Always set a timer. Because, let’s face it, that “quick check” on social media might turn into an hour-long scroll, and nobody wants burnt quinoa.
Armed with these pro tips, you’re not just a quinoa enthusiast; you’re a quinoa legend. Now, go make the ancient Incas proud! Or, at the very least, make your next-door vegan neighbor a tad envious.
Quinoa FAQ: Because You Probably Have Questions
Besides being a trendy grain that every health guru and their pet parrot seem to love? Quinoa is a complete protein, meaning it has all nine essential amino acids. It’s also gluten-free, high in fiber, and packed with vitamins and minerals. So, yes, it’s kind of a big deal.
Absolutely! If you’ve mastered the art of forgetting pots on the stove, a rice cooker is a godsend. Use the same 2:1 water-to-quinoa ratio, push the button, and let technology do its thing.
You probably skipped the rinsing step (remember, the one you thought you could ignore?). Quinoa has a natural coating called saponin that can taste bitter. Always give it a good rinse to avoid the bitterness.
Store it in a cool, dry place, like your pantry. Make sure it’s sealed in an airtight container to keep out any moisture and pesky pantry bugs.
While quinoa is lower in carbs than some other grains, it’s not exactly “low-carb”. If you’re on a strict low-carb diet, you might want to consume it in moderation.
Heck, yes! Throw in some garlic, bay leaves, or even a dash of soy sauce while it’s boiling. Quinoa is like a sponge; it’ll soak up all those delicious flavors.
You can microwave it (covered and with a splash of water) or sauté it in a pan with a little oil. Either way, it’s quick, easy, and keeps the fluffiness intact.
If you’re looking to expand your grain horizons, try farro, bulgur, or barley. Each has its own unique texture and flavor, but all are worthy additions to your culinary repertoire.


