Cold brew coffee — the nectar of hipsters and the ambrosia of the sleep-deprived. You might think this magical concoction is best left to the baristas who wear beanies in the summertime. You could be forgiven for that, really. But, dear friend, I have good news: you too can make this liquid gold at home. Yes, you. Even if your culinary prowess extends only as far as burning instant noodles.
Let’s be real — most of us can’t even function without coffee, much less do anything complicated. The thought of “making” anything other than a phone call for delivery might send shivers down your spine. Fear not, brave soul. Making cold brew coffee at home is so easy, even a caffeinated cat could do it. Probably.
Ingredients and Measurements:
If you’re still reading, it’s safe to say you’re committed. Or bored. Or procrastinating. Either way, let’s get you started. Here’s what you’ll need:
- Coffee Beans: 1 cup, coarsely ground. And for heaven’s sake, make sure these are good quality beans. I mean, you could go for the cheap stuff, but then you’re basically making the coffee equivalent of a watercolor painting with ketchup.
- Cold Water: 4 cups. Yes, COLD. This isn’t called ‘room temperature brew.’
- Patience: A lot. Cold brew is the sloth of the coffee world. It likes to take its sweet, sweet time.
- A Large Pitcher or Jar: You’re making more than one cup here, champ.
- A Strainer or Cheesecloth: You didn’t think we’d let you drink it with the coffee grounds, did you?
- Optional Add-ins: Milk, sugar, simple syrup, tears of your enemies, etc.
- Optional Equipment: A ruler, if you’re the obsessive type who needs to measure how coarsely the coffee is ground.
Step 1: Pick Your Poison (Coffee Beans)
The first thing you want to do is choose your coffee beans. Now, this is crucial, people. Your beans are the foundation, the cornerstone, the Chris Hemsworth of your cold brew. You want something bold but not too acidic, like that perfect date who’s attractive but doesn’t make you question your life choices. Got your beans? Great. If not, just pause your Netflix binge and go get some. We’ll wait.
Step 2: Grind Till You Find… the Right Texture
Coarsely ground coffee is your goal. You’re not making espresso, so don’t grind your beans into a fine powder unless you enjoy sipping on mud. The consistency should be somewhere between breadcrumbs and gravel. Picture making a sandcastle, but instead of sand, it’s future coffee. If your grinder has settings, opt for the ‘coarse’ one. If you don’t have a grinder, a good ol’ fashioned rolling pin will do. It’s like baking, but without the potential for a Pinterest fail.
Step 3: Mix it Up
Now, take your large pitcher or jar. If it has a previous history of holding something like pickles, please wash it. Unless pickle-flavored cold brew is your thing; who am I to judge? Add your coarsely ground coffee to the container, gently whispering sweet affirmations to it as you go. Then add the four cups of cold water. Stir it up until all the coffee grounds are saturated. Congratulations, you’ve just made… muddy water. But wait, the magic is yet to come.
Alright, my little fledgling barista, I’ve got you started on your first cold brew adventure. The steps are just that easy, and let’s be honest, if they were any harder you’d be out the door to your local café faster than you can say, “Venti, no whip, half-caf, extra shot, two pumps of vanilla.”
But hold your horses, there’s still work to be done.
Step 4: The Waiting Game
This is where your patience is tested. Take your muddy water — I mean, your exquisite coffee-to-be — and cover it. Place it in the refrigerator. Now, sit back, relax, and binge-watch that Netflix series you’ve been meaning to get to, or finally start that novel you bought two years ago and used only as a coaster. Let the coffee steep for at least 12 to 18 hours. Yup, you heard me right. This isn’t your jittery 2-minute espresso; it’s the “Lord of the Rings Extended Edition” of coffee.
Step 5: Strain Your Brain, and the Coffee
After what seems like an eternity (or just an average DMV wait), your cold brew is ready for the next stage. Remove the pitcher from the refrigerator and marvel at your accomplishment. Take a moment. Really soak it in. Then, get your strainer or cheesecloth and another clean jar or pitcher. Strain the cold brew, making sure to catch all the coffee grounds. This is the birth of your cold brew, and you’re the proud parent. Mazel tov!
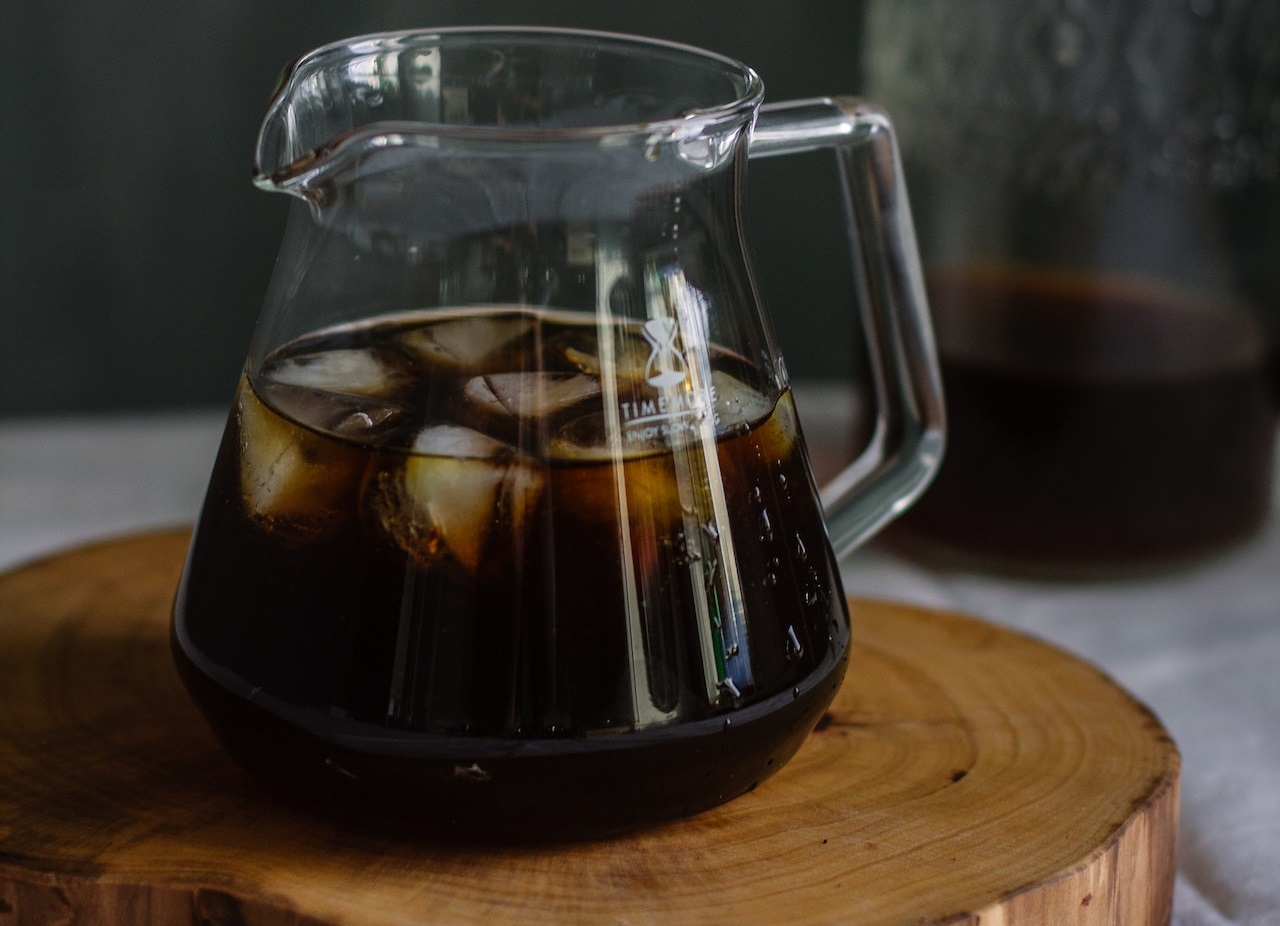
Step 6: Serve it Like You Mean it
Here’s where your inner artist can shine. You can pour your cold brew over ice, add milk or a milk substitute (almond, soy, oat — pick your poison), throw in some sugar or simple syrup, or even add a splash of vanilla or hazelnut flavoring. If you want to impress or pretend you’re more sophisticated than you are, garnish it with a slice of orange or a cinnamon stick.
Step 7: Store or Hoard
What’s that? You made too much cold brew? Oh, the horror! Just kidding. Cold brew can be stored in the fridge for up to two weeks, although let’s be real — you’ll drink it all long before then. Pour it into a sealable bottle or just keep it in the pitcher, shoved behind last week’s questionable take-out.
Step 8: Accept Your New Hipster Status
Congratulations! You’ve officially leveled up from instant coffee pleb to cold brew connoisseur. Feel free to use fancy terms like “aroma” and “mouthfeel,” and look down upon those still in the dark ages of hot, hastily brewed coffee. You’re better than that now. You’re a cold brew maker.
So, there you have it. Making cold brew coffee is so simple, even someone who’s half-awake, hungover, or knee-deep in existential dread can manage it. Welcome to the league of extraordinary lazy geniuses. Your badge is in the mail. Probably.
Go forth and enjoy the fruits of your minimal labor. Remember, in the world of coffee, cold brew is king. Or queen. Or whatever royalty you aspire to be. Just own it. Cheers!