Oh, you’re still roasting chicken the boring way? I see. Well, congratulations on finally deciding to elevate your culinary prowess and daring to venture into the elite world of chicken baking. If you’ve burnt toast or even thought instant noodles were a challenge, you’re in for a treat! Because this, dear friend, is a life-changing, absolutely simple, and downright funny guide on how to bake a chicken.
The Ingredients (because shopping lists are a thing):
- 1 whole chicken, preferably dead and plucked, about 4-5 lbs (1.8-2.3 kg). Remember to wink at it before purchasing.
- 3 tablespoons olive oil, or more if you’re feeling slippery.
- 1 teaspoon salt, and if you spill a little more, who’s counting anyway?
- ½ teaspoon black pepper, freshly ground (or from the dollar store, I won’t judge).
- 2 teaspoons paprika. It adds color, flavor, and it’s fun to say. Try it, “PAP-ri-kaaa.”
- 3 cloves garlic, minced. Or, if you’re a vampire, skip this step.
- 2 tablespoons of fresh lemon juice, freshly squeezed. No, not from the plastic lemon bottle, Karen.
- Some mixed fresh herbs – thyme, rosemary, sage. Fresh from your garden, or your neighbor’s… they won’t notice.
Instructions (Because apparently throwing it in the oven isn’t enough):
- Prep the Bird: First and foremost, clear your counter. I know, I know, it’s hard to say goodbye to the three-day-old pizza crust, but trust me, it’ll be worth it. Now, take your chicken, give it a good pat down, sort of like airport security. Make sure there are no surprise packages inside – giblets, neck, your lost TV remote.
- Marinate and Massage: In a bowl, mix your olive oil, salt, pepper, paprika, garlic, and lemon juice. Smell that? That’s the smell of victory. Now, show your chicken some love. Give it a gentle massage with this divine mixture. Remember, it’s not a wrestling match; be kind to your soon-to-be dinner.
- The Importance of Being Rested: Let the chicken rest. Give it a moment. Play some soothing jazz. It’s been through a lot. About 30 minutes to an hour should suffice.
- Heat things up: Meanwhile, preheat your oven to a blazing 425°F (220°C). No, don’t just guess the temperature, Karen. Use the oven’s controls. They’re there for a reason.
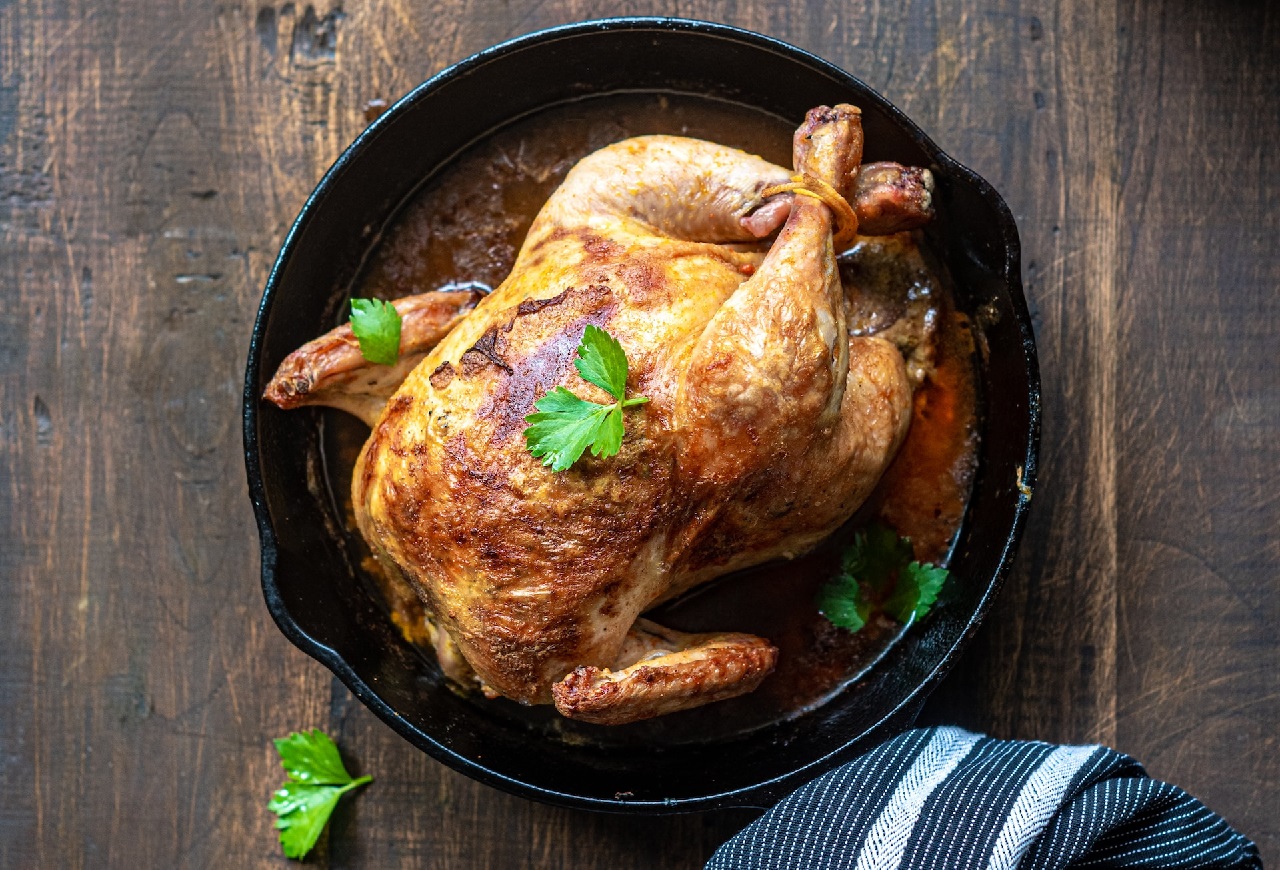
- Position and Presentation: Place the chicken, breast side up, in a roasting pan or if you’re feeling fancy, on a bed of chopped vegetables (carrots, onions, potatoes). These veggies aren’t just for show; they’ll soak up all those delicious chicken juices.
- Dress it Up with Herbs: Remember those fresh herbs you “borrowed” from your neighbor? Now’s their time to shine. Stuff them inside the chicken, and sprinkle some on top. It’s like the chicken’s going to its own herb party.
- Bake with Flair (and a timer): Slide that adorned chicken into the oven. Set your timer for about 50-60 minutes because unlike a watched pot that never boils, an unwatched chicken will roast to a crisp. If you’re trying to impress your in-laws, avoid the temptation to turn your chicken into charcoal. Trust me, crispy skin good; burnt offerings bad.
- Temperature Checks (and Not the Forehead Kind): To ensure your chicken isn’t playing tricks on you, get a meat thermometer. It’s like a tiny spear, but for food. Stick it into the thickest part of the chicken (usually the thigh), ensuring it doesn’t touch the bone. We’re aiming for an internal temperature of 165°F (74°C). Anything less, and you’re risking a cameo from Salmonella. Not the fun guest you want at your dinner party.
- Let it Rest (Again): Once your bird is out of the oven, resist the temptation to dive in immediately. Let it rest for about 15 minutes. This isn’t just to test your patience. It helps the juices redistribute so that when you do cut it, you’re not left with a dry disappointment.
- Carving, Not Butchering: So you’ve come this far. Don’t ruin it now by tearing into it like a T-Rex. Take a sharp knife (yes, sharp — those butter knives won’t cut it here) and carve the chicken into your desired pieces. Need carving tips? There are approximately 3,000 YouTube tutorials. Or, you know, just wing it.
- The Grand Presentation: Move over, Gordon Ramsay. Plate your chicken with style. If you roasted veggies, place them artistically around your perfectly baked chicken. Add a sprig of something green on top (parsley, cilantro, that random weed from your backyard – just kidding on the last one).
- Feign Humility: When your guests/family/you praise the magnificent bird you’ve just baked, remember to play it cool. “Oh, this little thing? Just threw it together. No big deal.” Inside, bask in your glory.
In Conclusion
Who knew that baking a chicken could be so entertaining, and — dare I say it — easy? Now that you’re armed with this knowledge, you’re practically ready for your own cooking show. Or at least, to be the star of your next potluck. Go forth, intrepid chef, and may all your chickens be perfectly roasted.
3 Bonus Recipes of Baked Chicken: Savory, Sweet, and Spicy
There’s a saying that variety is the spice of life, and when it comes to chicken, truer words have never been spoken. Whether you’re craving something classic and savory, or your taste buds are itching for a dash of sweetness, or perhaps you’re in the mood to set your palate ablaze with some heat – we’ve got you covered. Here are three chicken recipes tailored to suit whatever culinary adventure you’re in the mood for:
1. Savory: Garlic Herb Roasted Chicken
Ingredients:
- 1 whole chicken (about 4-5 lbs.)
- 4 tablespoons olive oil
- 6 cloves garlic, minced
- 1 tablespoon fresh rosemary, chopped
- 1 tablespoon fresh thyme, chopped
- 1 tablespoon fresh sage, chopped
- Salt and pepper, to taste
- 1 lemon, halved
- 1 onion, quartered
Instructions:
- Preheat the oven to 425°F (220°C).
- In a bowl, combine olive oil, garlic, rosemary, thyme, sage, salt, and pepper.
- Rub the mixture all over the chicken.
- Stuff the chicken with the lemon halves and onion quarters.
- Place the chicken in a roasting pan and bake for about 50-60 minutes, or until the internal temperature reaches 165°F (74°C).
- Let rest for 15 minutes before serving.
2. Sweet: Honey Balsamic Glazed Chicken
Ingredients:
- 4 chicken breasts (boneless, skinless)
- Salt and pepper, to taste
- 3 tablespoons olive oil
- 1/4 cup balsamic vinegar
- 1/4 cup honey
- 2 cloves garlic, minced
- 1 tablespoon soy sauce
- 1 teaspoon dried basil
Instructions:
- Season chicken breasts with salt and pepper.
- Heat olive oil in a skillet over medium heat. Add the chicken breasts and cook until browned on both sides.
- In a bowl, whisk together balsamic vinegar, honey, garlic, soy sauce, and basil.
- Pour the mixture over the chicken in the skillet.
- Simmer for 10-15 minutes, or until the chicken is fully cooked and the sauce has thickened.
- Serve with the glaze spooned over the top.
3. Spicy: Spicy Cilantro Lime Chicken
Ingredients:
- 4 chicken thighs (bone-in, skin-on)
- Salt and pepper, to taste
- 2 tablespoons olive oil
- Juice of 2 limes
- 2 tablespoons honey
- 2 tablespoons sriracha (or to taste, for desired spiciness)
- 1/4 cup fresh cilantro, chopped
- 2 cloves garlic, minced
Instructions:
- Season chicken thighs with salt and pepper.
- In a large skillet, heat olive oil over medium-high heat. Add the chicken thighs, skin-side down, and cook until the skin is golden and crispy.
- In a bowl, whisk together lime juice, honey, sriracha, cilantro, and garlic.
- Turn the chicken over and pour the sauce over the top.
- Reduce the heat to low and let the chicken simmer in the sauce for 15-20 minutes, or until fully cooked.
- Garnish with additional fresh cilantro before serving.
Chicken Baking Pro Tips:
- Brine Time: If you’ve got an extra hour (or overnight), consider brining your chicken. This process involves soaking the chicken in a saltwater solution, which helps to tenderize the meat and lock in moisture. For a basic brine, mix 1/4 cup of salt with 4 cups of water. Remember, after brining, rinse the chicken well to get rid of excess salt.
- Room Temperature Rule: Before baking, let the chicken sit out for about 20 minutes to reach room temperature. This ensures even cooking. No one likes a chicken that’s overdone on the outside and still doing the cha-cha on the inside.
- Turn and Burn: To get an even color all around your chicken, turn it halfway through baking. Think of it as giving your chicken a tan session.
- Veggies for the Win: Lining your roasting pan with veggies not only gives you a side dish but also lifts the chicken, allowing heat to circulate better. Plus, those veggies soak up all those delicious chicken juices, giving you a flavorful bonus.
- Tools of the Trade: Invest in a good meat thermometer. It’s the best way to tell if your chicken is done without playing the “cut and peek” game.
- Rest is Best: Letting the chicken rest after baking is not just a fancy step; it allows juices to redistribute. Cutting immediately means all those flavors flood out, leaving you with dryer meat.
- Leftover Makeover: Got leftovers? Don’t just reheat and repeat. Shred the remaining chicken for salads, sandwiches, or tacos. One day’s roast is another day’s sandwich filler.
- Clean as You Go: While it’s tempting to leave the mess for “future you,” cleaning as you go not only saves time but also prevents any cross-contamination. Raw chicken is not something to be trifled with.
- Don’t Wing It: Different parts of the chicken cook at different rates. If you’re mixing and matching pieces (like drumsticks, wings, and breasts), check them individually for doneness. A breast might be done before a thigh, for instance.
- Flavor Infusers: While we provided specific recipes, feel free to experiment. Citrus fruits, beer, wine, or even a cola can be used to infuse your chicken with flavor. Get creative; maybe you’ll stumble upon the next big thing in chicken culinary arts!
Wrap your chicken baking adventure with these pro tips, and you’ll not only have a delicious dish but also a new-found swagger in the kitchen. Remember, baking chicken isn’t just about the end result, but the joy of the journey… and the delightful aromas that journey brings!
Frequently Asked Questions (FAQ) about Baking Chicken
Letting your chicken take a short nap (aka rest) after baking ensures the juices redistribute. If you cut it immediately, the juices will run out faster than you can say, “Oops!” Result? Dry, sad chicken. We don’t want that.
Absolutely! Just remember, different parts might cook at different rates. So, wings will be done way before those thick thighs. Adjust cooking times and always check for doneness.
Skip the rinse! Rinsing doesn’t kill bacteria; cooking does. Plus, rinsing can spread germs around your kitchen. Let’s keep it clean and safe, folks!
Of course! But remember, dried herbs are more potent than fresh ones. As a general rule, use one-third the amount of dried herbs as you would fresh. So, if a recipe calls for 3 tablespoons of fresh rosemary, you’d use 1 tablespoon of dried.
Improvise! You can use a large skillet, a baking dish, or even place a wire rack on top of a baking sheet. As they say, when there’s a will, there’s a way… to roast chicken.
While a thermometer is the gold standard, you can also cut into the thickest part and check. The juices should run clear, and the meat should be opaque with no pink hues. But seriously, invest in a thermometer; it’s a game-changer.
Crispy skin lovers, unite! For that golden, crispy perfection, ensure your oven is hot enough, pat your chicken dry before baking, and consider brushing it with a bit of oil or butter. A high-heat blast at the end can also help. Also, check if you accidentally bought a rubber chicken. Just kidding!
Absolutely, and you should if you have the time! Marinating overnight allows the flavors to really seep in, making your chicken more flavorful and tender. Just ensure it’s refrigerated and in a sealed container or plastic bag.
Not a fan of Popeye’s girlfriend? No worries! You can substitute with other oils like canola, vegetable, or even melted butter. Each brings its own flavor profile.
Don’t panic! If the outside is already golden, cover the chicken with aluminum foil (this prevents further browning) and continue baking until fully cooked inside.
Happy baking and bon appétit!


