The milkshake — a monument to mankind’s culinary ingenuity, second only to the invention of fire and maybe, just maybe, the spork. If you’ve been living under a rock, or perhaps in a kale-smoothie-only commune, and have yet to master this culinary marvel, don’t worry. I am here to help you achieve this momentous task. Yes, brace yourselves; we’re about to make a milkshake.
Step 1: Gather Ingredients Like a Squirrel Hoarding Nuts
The Essentials:
- Ice Cream (2 cups) – The cornerstone of any milkshake. If you go low-fat here, don’t talk to me.
- Milk (1 cup) – Yes, it’s called a milk-shake, not a water-shake. Dairy or a full-fat plant-based option, if you must.
- Sugar (1 tablespoon) – Because the ice cream isn’t sugary enough.
The Impractical But Show-Offy Options:
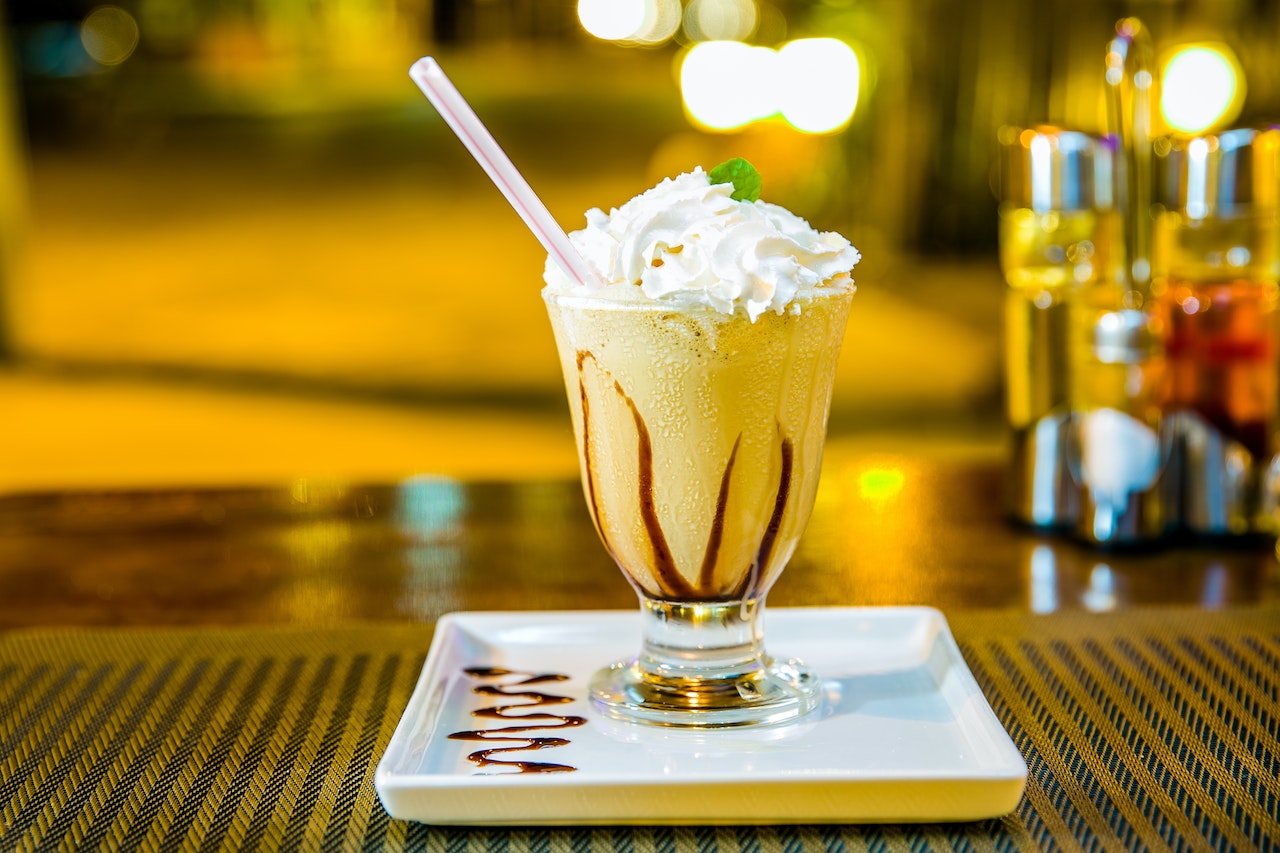
- Whipped Cream – Calories don’t count when they’re floating.
- Chocolate Syrup – For that Jackson Pollock look on your masterpiece.
- A Cherry – It’s like the garnish in a cocktail, but for five-year-olds.
Step 2: Procure Tools Worthy of a Viking Warlord
- Blender – The only reason to own one if you don’t make smoothies.
- Glass – To put the milkshake in, not to examine your poor life choices.
- Spoon or Straw – For those who can’t decide whether to eat or drink their calories.
Step 3: Pre-Game Like It’s College All Over Again
Before you throw things into the blender willy-nilly like it’s a clothing hamper, let’s discuss strategy. A good milkshake is all about ratios. Too much ice cream and you’ll need a chisel. Too much milk and you’ve made yourself a nice cold soup. So listen carefully: put two cups of ice cream and one cup of milk. I repeat, 2:1. This is not an arbitrary number; it’s a divine ratio passed down from the milkshake gods.
Step 4: The Blendening
With your blender plugged in and your ingredients within reach, it’s time for the moment of truth. Dump in your ice cream like you’re filling a pothole. Then pour in the milk as if it’s the elixir of life. Sprinkle the sugar like you’re Tinkerbell, and you’re golden.
Turn the blender on low, because unlike public speaking, you don’t want to start strong. You’re not making a tornado; you’re crafting a potion of happiness. Gradually increase the speed until your mixture resembles a cyclone of creamy perfection.
Now, I know what you’re thinking: “Should I add the optional whipped cream, chocolate syrup, and cherry into the blender?” The answer is a resounding no, unless you enjoy chaos and misery. These are your ‘finishing touches,’ akin to adding a pocket square to a tuxedo or sprinkles to a cupcake. They serve no functional purpose, but they make you feel sophisticated.
Step 5: The Pour
Pouring a milkshake is a bit like defusing a bomb. One wrong move and it’s all over your countertop, your hopes, your dreams, and maybe even your cat. With the blender off (let’s not get too adventurous), take the pitcher and gracefully pour the thick, luscious liquid into your glass. If you spill some, leave it. It’s called “character.”
Step 6: Adorn Like a Christmas Tree
Remember those show-offy options? Now’s their time to shine. Take a can of whipped cream and, holding it at a slight angle, fill the top of your glass until you create a mountain that resembles the one in your favorite hiking photo — you know, the one you took from the parking lot. Drizzle chocolate syrup over the whipped cream as if you’re a maestro conducting a symphony of calories. Finally, put that cherry on top as the crowning jewel.
Step 7: The Utensil Dilemma
Here we are, the Sophie’s Choice of milkshake-making: spoon or straw? If you’re a purist, a spoon allows for savoring each rich bite. A straw, however, offers that delightful slurping sound that says, “Look at me, I’m enjoying life.” Can’t decide? Use both. You’re an adult; you can make these kinds of decisions.
Step 8: Instagram or It Didn’t Happen
You didn’t go through this intricate, labor-intensive process not to share it with the world. Give your phone that perfect flat-lay view, use a filter to make it look like your milkshake has been sun-kissed, and hashtag the life out of it. #MilkshakeMasterpiece #BetterThanYourKaleSmoothie #ChefLife
Step 9: Taste Test
Okay, drama over. Time to dig in. Take a sip or a spoonful, and let that dairy delight wash over you. If angels don’t sing and fireworks don’t explode in the background, you’ve either done something terribly wrong or you’re just too hard to please.
Step 10: The Aftermath
So you’ve finished your milkshake, and you’re left with an empty glass and a full heart. Don’t forget to wash your blender unless you want to discover a new ecosystem growing in there tomorrow. And give yourself a pat on the back. You’ve just made a milkshake; you’re practically ready for your own cooking show.
Final Thoughts:
Making a milkshake isn’t just a culinary endeavor; it’s a journey of self-discovery. You’ve not only created a delicious treat; you’ve also proven that you can follow simple instructions, a skill that should not be underestimated in this day and age. So go forth, milkshake warrior, and may your future be as smooth and sweet as the masterpiece you’ve just created.
And remember, if anyone questions your milkshake skills, just tell them you’ve been trained by an article on the internet. That’ll show ’em.
Bonus: 3 Milkshake Recipes Because You’re an Overachiever
So you’ve mastered the classic milkshake, and now you’re ready for your next culinary challenge? Don’t worry; I’ve got you covered. Here are three milkshake recipes to expand your skillset and add a few extra rolls to your waistline. You’re welcome.
1. Chocolate Peanut Butter Bliss
Ingredients:
- 2 cups chocolate ice cream
- 1 cup milk (preferably whole milk)
- 2 tablespoons peanut butter
- 1 tablespoon chocolate syrup
- Whipped cream and a Reese’s Cup for garnish
How To:
- Toss the chocolate ice cream, milk, peanut butter, and chocolate syrup into your blender.
- Blend until smooth. If you’ve already forgotten how to do this, I weep for your future.
- Pour into a glass and top with whipped cream.
- Garnish with a Reese’s Cup because why not make it a meal?
2. Vegan Avocado Green Dream
Ingredients:
- 2 cups vegan vanilla ice cream
- 1 cup almond milk
- 1 ripe avocado, peeled and pitted
- A dash of mint extract or a handful of fresh mint leaves
- Whipped coconut cream and a mint leaf for garnish
How To:
- Add vegan ice cream, almond milk, avocado, and mint into your blender.
- Blend until creamy and green, but not like swamp water.
- Pour into a glass and top with whipped coconut cream.
- Add a mint leaf on top because you’re classy like that.
3. Cookie Monster Overload
Ingredients:
- 2 cups cookies and cream ice cream
- 1 cup milk
- 3 Oreo cookies, plus one for garnish
- Whipped cream and chocolate syrup for garnish
How To:
- Combine cookies and cream ice cream, milk, and 3 Oreos in your blender.
- Blend until it looks like something the Cookie Monster would dive into.
- Pour into a glass, and add whipped cream on top.
- Crumble the remaining Oreo on top and drizzle with chocolate syrup.
And there you have it, folks! Three milkshake recipes to make you the hero at any party, gathering, or sad Tuesday night alone. Take these recipes, run with them, and remember: life’s too short for bad milkshakes. Cheers!
Pro Tips to Elevate Your Milkshake Game:
- Temperature is Key: Ensure your ice cream is cold but slightly softened before blending. This helps to create a smoother consistency without overworking your blender. A good rule of thumb is to let the ice cream sit out of the freezer for about 5 minutes before starting your milkshake masterpiece.
- Quality Ingredients Matter: Opt for high-quality, full-fat ice cream and fresh milk. The better your ingredients, the better your milkshake will taste. Don’t skimp here; your taste buds will thank you.
- Flavor Combinations: Don’t be afraid to experiment with flavors. Think outside the box with ingredients like spices (a pinch of cinnamon or nutmeg), extracts (vanilla, almond, or mint), or even a splash of coffee for a mocha twist.
- Texture is Everything: For an extra creamy texture, add a scoop of frozen yogurt or a banana to your milkshake. This will give it a luxurious mouthfeel that’s hard to beat.
- Balance Your Sweetness: Depending on how sweet your ice cream is, you might not need that extra tablespoon of sugar. Taste your milkshake before adding sugar, and sweeten to your preference.
- Chill Your Glass: For an extra refreshing experience, place your milkshake glass in the freezer for 5-10 minutes before pouring. This keeps your milkshake colder for longer, ensuring every sip is as good as the first.
- Get Creative with Garnishes: Don’t stop at whipped cream and a cherry. Try adding crushed cookies, sprinkles, or even a drizzle of caramel or fruit sauce. A sprig of fresh mint can add a burst of color and flavor.
- The Perfect Pour: When pouring your milkshake, do it slowly and at an angle. This helps to preserve the frothy top layer, ensuring you get a bit of that delightful foam in every sip.
- Always Taste Before Serving: Give your milkshake a quick taste before pouring it into the glass. This is your chance to adjust the sweetness or add more milk if it’s too thick.
- Clean as You Go: Milkshakes are fun to make and even more fun to eat, but they can be messy. To save yourself the headache later, rinse your blender and any used tools right after use. This prevents any residue from hardening and makes for an easier clean-up.
- Serving Size Matters: Remember, milkshakes are rich and decadent. A little goes a long way, so consider serving in smaller glasses for a perfect portion size.
- Create a Milkshake Bar: If you’re entertaining, set up a milkshake bar with various ice creams, mix-ins, and toppings. Let your guests have fun creating their own milkshake concoctions.
- Seasonal and Festive Flavors: Take advantage of seasonal ingredients. Pumpkin spice in the fall, peppermint during the holidays, or fresh berries in the summer can add a festive and delicious twist to your milkshake.
- Practice Makes Perfect: Don’t get discouraged if your first milkshake isn’t perfect. Making the perfect milkshake is an art form, and like all art forms, it takes a little practice. Keep experimenting with different ingredients and ratios until you find your perfect blend.
- Savor the Moment: Lastly, remember that making a milkshake is not just about the end product; it’s about enjoying the process. So, have fun, experiment, and savor the moment (and the milkshake, of course).
FAQ: Mastering the Art of Milkshake Making
While a blender is the most efficient tool for making a smooth and creamy milkshake, you can use a hand mixer or even a whisk and some elbow grease. The texture might not be as smooth, but you’ll still end up with a delicious treat.
Absolutely! There are plenty of delicious non-dairy milks (such as almond, soy, or oat milk) and non-dairy ice creams available on the market. Just ensure both are full-fat for the creamiest result.
For a thicker milkshake, you can add more ice cream, use less milk, or add a thickening agent like a banana or a scoop of frozen yogurt.
The easiest way to clean your blender is to fill it halfway with warm water and add a drop of dish soap. Blend on high for a few seconds, pour out the soapy water, and rinse well. Be sure to clean immediately after use to prevent residue from hardening.
Milkshakes are best served immediately. However, you can prepare your ingredients ahead of time and store them in the freezer until you’re ready to blend.
To prevent excessive frothiness, start the blender on low and gradually increase the speed. Overblending can incorporate too much air, leading to a frothy texture.
Yes, you can add alcohol to your milkshake for an adult twist. Liqueurs like Baileys, Kahlua, or crème de menthe pair well with milkshakes. Just be mindful of the quantity, as too much liquid can thin out your shake.
Your milkshake is ready when it has a smooth, creamy consistency without any ice cream chunks. The whole blending process should take about 30 seconds to a minute, depending on your blender’s power and the ingredients used.
While ice cream is a key ingredient in traditional milkshakes, you can make a milkshake-like beverage using frozen fruit, yogurt, and milk. Keep in mind that this will result in a different texture and flavor profile.
Absolutely! Don’t be afraid to get creative. Ingredients like a pinch of sea salt, a splash of vanilla extract, or even a spoonful of peanut butter can add an unexpected and delightful twist to your milkshake.


