Ah, the humble potato. Nature’s dirt-clad gem, the cornerstone of lazy dinners everywhere. Have you ever looked at a potato and thought, “Wow, how could something so simple be so complicated to cook?” Me neither, but just in case you’re among the rare few who can’t even manage to transform this starchy lump into something edible, this guide is for you.
Step 1: Choose the Right Potato, Einstein
So you’re standing in the grocery store, mesmerized by the array of potatoes in front of you. There’s Russet, Yukon Gold, fingerling, and about a dozen more options that have no business being that specific for something that ultimately becomes fries. Now, since this is rocket science, let me break it down for you: go for the Russet. Yes, that big, ugly, brown one — like the ogre of the potato world. It’s perfect for baking. But hey, if you’re feeling rebellious and want to choose a different variety, go ahead. After all, life’s short. Make bad decisions.
Step 2: To Wash or Not To Wash? (Just Wash It)
Once you’ve made the life-altering decision of choosing your potato, it’s time to wash it. Yes, you heard me, wash it. These things come from the ground, where dirt lives. I know, washing is such a hassle, but trust me, you don’t want to bite into a gritty spud. Unless, of course, you enjoy the texture of sandpaper on your palate. Use a scrub brush if you’re feeling especially industrious. Who knows? Maybe you’ll remove enough skin to make a baby potato.
Step 3: Summon Your Inner Picasso
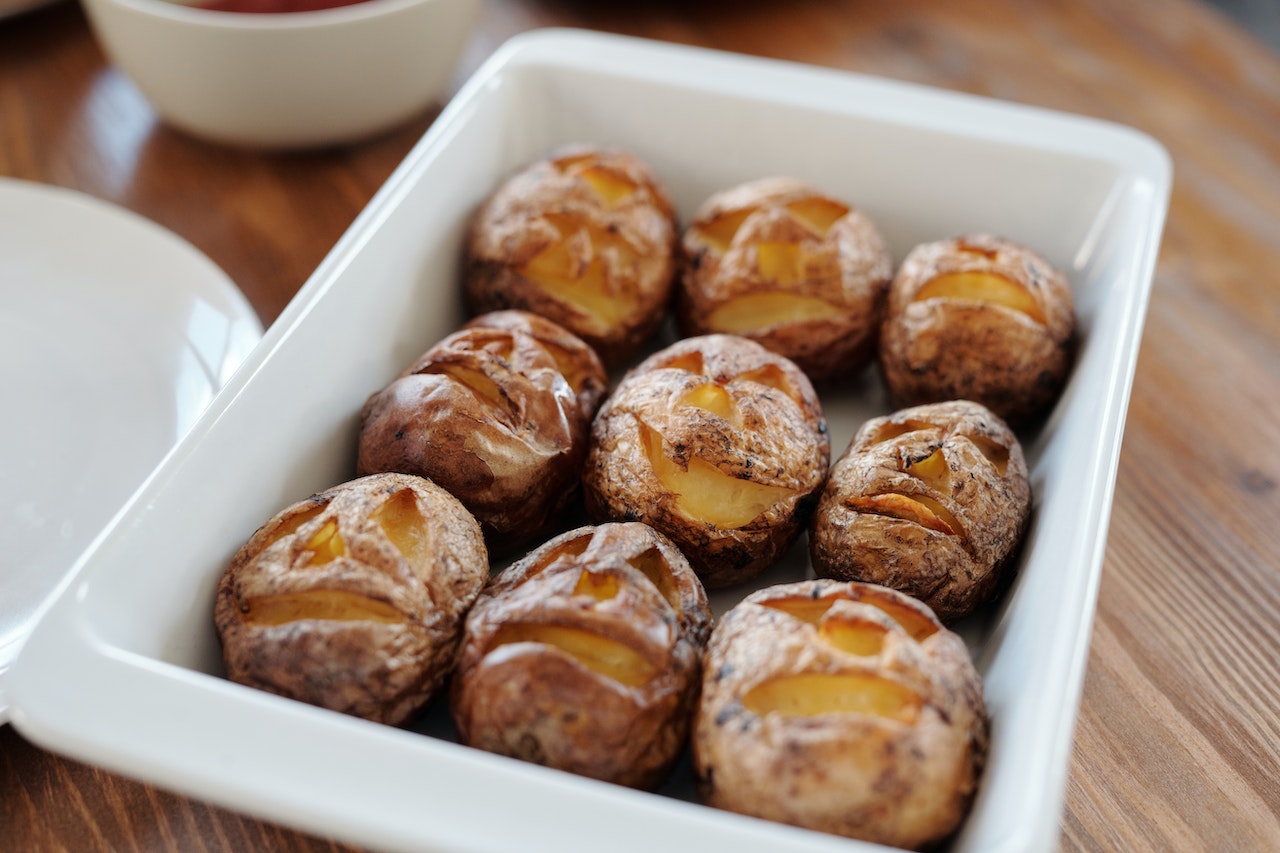
Congratulations, you’ve made it to the carving stage. Get a knife — and please, make sure it’s sharp. A dull knife is about as useful as a screen door on a submarine. Now, some Michelin-star-wannabes will tell you to poke holes all over your potato using a fork. But why limit yourself? Channel your inner Picasso and carve out a monogram or a smiley face. These artistic expressions serve the same purpose as the fork holes — to let the steam escape. So unless you want your potato to explode and redecorate your oven interior, don’t skip this step.
Step 4: Oil It Up, Baby!
Ah, the pièce de résistance: olive oil. You can also use canola oil, vegetable oil, or even motor oil if you’re feeling edgy. Just kidding, stick to food-grade oils. Slather that spud up like you’re prepping for a beach day in the sun. This won’t make your potato “healthy” by any means, but it’ll give the skin that nice, crisp texture that’ll make you forget all about your fitness goals. A pinch of salt can add a gourmet flair, or a ton of it if you’re into living dangerously.
By now, you must be thinking, “Wow, this is so complicated!” You’re absolutely right; it’s right up there with boiling water and breathing. But hang in there, we’re only halfway through this culinary expedition. After this, you’ll either have a delicious baked potato or a newfound appreciation for takeout. Either way, it’s a win-win!
Step 5: The Oven: Your Potato’s Vacation Home
Now, onto the grand stage for your potato’s one-man-show — the oven. Preheat that bad boy to 425°F (220°C), or 400°F (200°C) if you want to play it safe like you’re handling plutonium. Once the oven is hotter than a summer in Arizona, pop your potato in. No, you don’t need a baking sheet; just place it directly on the oven rack like the rebel you are. Be sure to position it in the middle for an even tan, because nobody likes an unevenly baked potato. If you’re worried about drips messing up your oven, put a baking sheet or piece of aluminum foil on the rack below the potato. Set a timer for 45-60 minutes, but feel free to forget about it and then panic when you remember it’s in the oven — that’s part of the fun.
Step 6: The Patience Game (Or Lack Thereof)
While your potato is baking, you’ve got a solid 45-60 minutes of pondering life’s greatest mysteries. Is your potato having an existential crisis in the oven? Will it come out a changed spud? Does it dream of becoming a French fry? This is the perfect time for you to engage in similarly transformative activities, like scrolling through your social media feeds or wondering why you’re reading an article on baking potatoes.
Step 7: The Grand Reveal
Alright, the moment of truth. Is your potato soft when you poke it with a fork? Yes? Well, then it’s done! No? Looks like you’ve invented the potato rock. Put it back in the oven for a few more minutes, and try not to think about how you’ve failed at cooking the simplest thing in the culinary world. When it’s finally done, pull it out (using oven mitts, please; you’ve been through enough already). Make a slit on top, but not too deep; this isn’t surgery. Fluff the insides with a fork, because at this point, who doesn’t love a fluffy potato?
Step 8: Unleash the Toppings
Ah, the toppings — a playground for your taste buds. Sour cream, chives, bacon bits, cheese; you can go as minimal or as extravagant as you like. I mean, you’ve just conquered baking a potato; you can do anything. Some people like to add salsa or chili, turning their baked potato into a multicultural experience. Go wild!
Step 9: The First Bite
After all the blood, sweat, and tears (okay, maybe just the sweat), it’s time for the first bite. The heavens open, angels sing, and you finally realize what all the fuss was about. Or maybe you don’t, and you swear off cooking forever. Either way, you’ve survived the battle.
Step 10: Take a Bow (Or Don’t)
Congratulations, you’ve done it! You’ve successfully transformed a humble lump of earth into a culinary masterpiece. Or at least something edible. Take a bow, snap a pic for the Instagram, and devour your creation like there’s no tomorrow. You’ve earned it.
So there you have it, a comprehensive guide on how to bake a potato. You’re now a certified potato artist. Wear that title with pride or abject shame; it’s your call. And the next time someone questions your cooking skills, just tell them you can bake a potato, sort of. And isn’t that what life’s all about?


