Well, well, well. Look who decided they’re too fancy for the supermarket butter. Or maybe you’ve been banned from the dairy aisle? No judgment here. If you’re on a mission to churn your liquid gold into the culinary world’s most esteemed fat, you’re in for a treat. Or at the very least, a decent arm workout.
Ingredients:
- Cream – about 2 cups (Nope, not the moisturizer you’ve been applying to your face. We’re talking heavy whipping cream.)
- Salt – a pinch or two (or none if you’re already salty enough)
- Patience – an awful lot
- A dash of desperation (because let’s face it, who wakes up thinking, “I’m going to make butter today!”)
Let’s Break it Down: The Not-So-Epic Process
Step 1: Source your Cream
First, you’re going to need cream. But not just any cream. Oh no, for this sophisticated venture, you need heavy whipping cream. Now, if you’re unsure about the difference between regular cream and whipping cream, congratulations! You’re normal. Most of us don’t give a hoot, but today, for butter-making, you do. The difference? Fat content. The more fat, the better your butter. So, for once in your life, go all out. Embrace the fat.
Step 2: The Pour
Pour the cream into a large bowl. Why a large bowl, you ask? Well, unless you want your kitchen to look like a scene from a dairy-themed horror movie, you’ll appreciate the extra space when things get splashy.
Step 3: Whisk Away (and Question Your Life Choices)
Now comes the fun part. Grab a whisk. If you don’t have one, first, what kind of kitchen are you running? But secondly, don’t panic. A fork will do. It’ll just take longer and your arm might fall off from exhaustion. Start whisking. And then whisk some more. And some more. When you’re about to give up, thinking “Who needs butter anyway?”, keep going. This is where the patience ingredient comes in handy.
After what feels like hours (but is probably closer to 8-10 minutes), you’ll notice your cream thickening and then suddenly separating into a solid (butter) and a liquid (buttermilk).
By now, you’re probably halfway between pride and regret. Perfect. You’re on the right track.
For those who live in the 21st century: If you’re not feeling the arm workout, this process can be significantly simplified by using an electric mixer. Pour the heavy whipping cream into a large bowl. Now, engage the mixer on a medium speed and let it work its magic. Watch as the cream goes through its phases: from liquid to whipped cream (resist the urge to stop here and eat it) and then further to the point of separation where you’ll have butter solids and buttermilk.
This process is faster and less labor-intensive than whisking by hand. You’ll get to the desired result in about 5-8 minutes depending on your mixer’s power.
Step 4: Let It Drain (Like Your Willpower)
Once you’ve achieved the elusive butter-and-buttermilk separation, take a moment to pat yourself on the back. Using a spoon or your hands (if you’re feeling adventurous), gather the solidified butter. Place it onto a sieve or fine mesh strainer over a bowl. You want to drain as much of the buttermilk as possible. Why? Because lingering buttermilk can make your precious homemade butter go rancid faster. And after all this effort, we don’t want you to end up with spoiled butter, do we?
Step 5: Give It a Cold Shower (or Two)
Take your lump of butter and move to the sink. Run cold water over it and use your hands to knead the butter. Think of it as a spa day for your butter. You’re rinsing away any last traces of buttermilk. It might seem redundant after the whole draining fiasco, but trust us, your future toast will thank you.
Step 6: The Salt Debacle
Remember that salt from our ingredients list? Now’s its time to shine! Sprinkle a pinch or two over your butter and knead it in. This not only flavors your butter but also helps in preserving it. If you’re watching your sodium or just inherently salty from this butter-making venture, you can skip this step.
Step 7: Shape Up or Ship Out
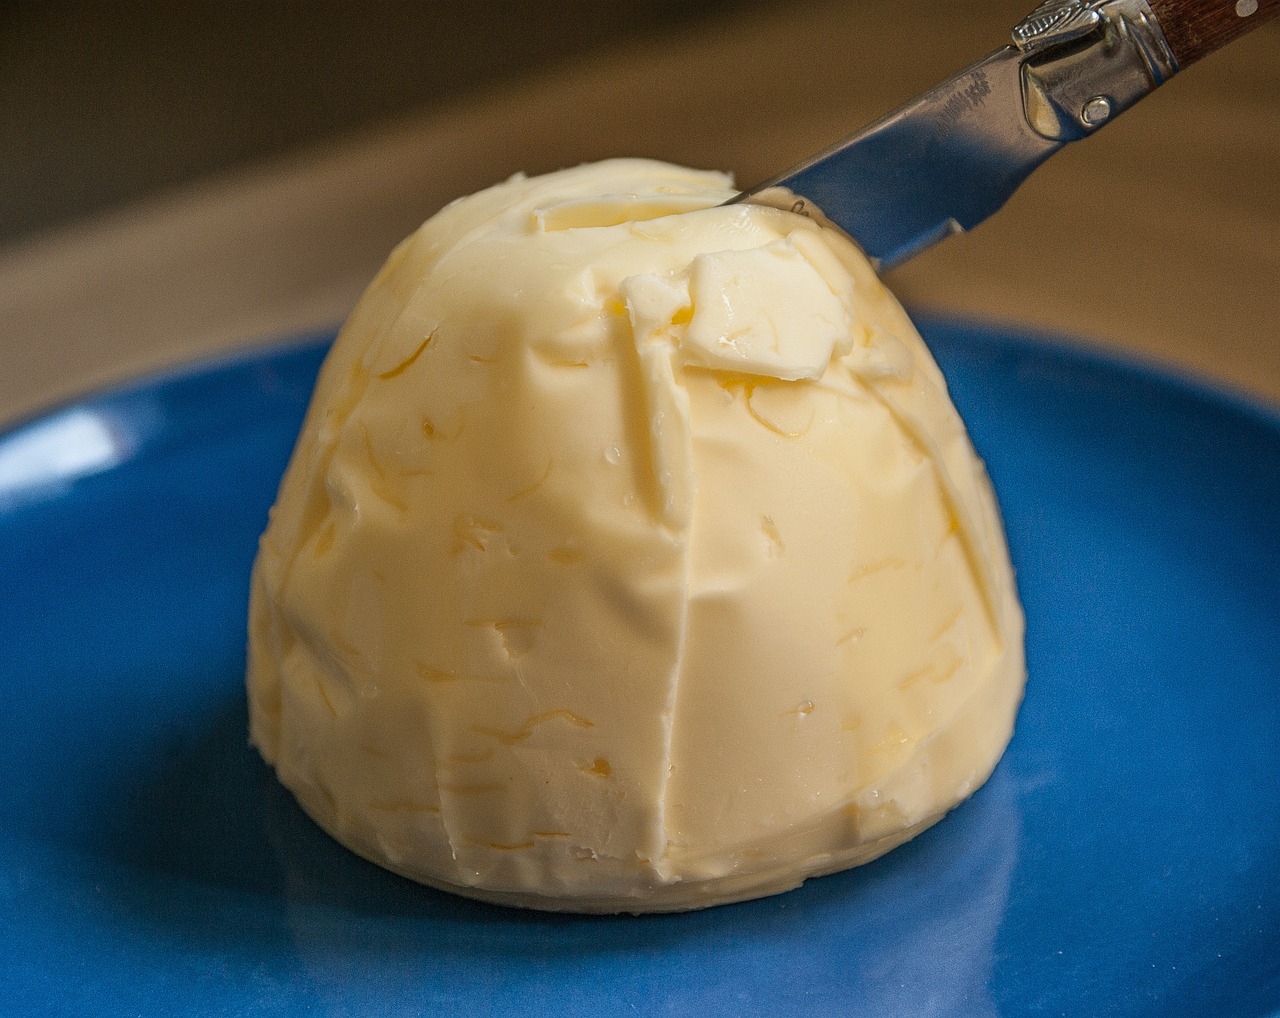
At this point, you have a lump of butter that’s probably as misshapen as your sanity. Time to mold it! You can use your hands, or if you’re feeling fancy, a butter mold. If you don’t have a butter mold because, like most of us, you don’t churn butter daily, just shape it into a block or roll. Place your beautiful creation in parchment paper or plastic wrap and refrigerate.
Step 8: Revel in Your Glory (Briefly)
Congratulations, you culinary masochist! You now have homemade butter. Take a moment to bask in your glory, take a selfie with it, and maybe even name it. Then slather it on toast, muffins, or straight onto your fingers (we don’t judge) and taste the fruits of your labor.
In Conclusion:
If this article has taught you anything, it’s that butter is both an exercise in patience and a testament to human’s ability to turn simple ingredients into magic. And, perhaps, that some things are better left to the professionals.
But where’s the fun in that? So, the next time someone asks you about your culinary prowess, you can humbly brag about that one time you made butter from scratch. And if they ask for proof, just show them your well-toned arms.