Welcome, brave soul, to the mystifying world of car maintenance, where the bravado meets the grease, and where you, yes you, can become the hero your car didn’t know it needed. Today’s agenda? Air filters! Those unsung heroes quietly doing the dirty work under your hood. Buckle up, because we’re about to embark on a thrilling roller coaster of dust, debris, and air filtration!
Decoding the Enigma of Air Filters
Before we dive headfirst into the nitty-gritty of air filter replacement, let’s take a moment to demystify what an air filter is and why it deserves your undivided attention.
An air filter, dear reader, is like the bouncer at a club, diligently keeping the riff-raff (dust, dirt, leaves, and other airborne debris) out while letting the cool kids (air) in. It ensures that your engine only breathes in the clean, pure air it needs to function at its best.
Benefits of Replacing Your Air Filter
Now, you might be thinking, “Why should I bother? It’s just an air filter!” Oh, how wrong you are! A clean air filter is like a breath of fresh air for your engine. It improves fuel efficiency (so you can spend your hard-earned cash on more exciting things like, I don’t know, novelty car air fresheners), enhances performance (so your car won’t feel like it’s dragging its feet), and reduces emissions (so you can pat yourself on the back for being environmentally friendly).
When to Replace Your Air Filter
“But how do I know when to replace it?” I hear you cry. Fear not, for I have answers. A good rule of thumb is to give your air filter a check-up every 12,000 to 15,000 miles (19,000-24,000 km), or once a year, whichever comes first. However, if you frequently drive in dusty or dirty conditions, you might want to roll up your sleeves and check it more often. Signs of a dirty air filter include a decrease in fuel efficiency, weird engine sounds (it’s basically your car’s way of crying for help), and the check engine light giving you the evil eye.
Replacing your air filter is not just a matter of car hygiene; it’s an act of love, a way to show your car that you care about its well-being. Plus, it’s a relatively cheap and easy way to avoid bigger, scarier problems down the line. Think of it as preventative medicine for your car. You wouldn’t ignore a cold until it turned into pneumonia, would you? Of course not. So don’t neglect your air filter.
How to Change Air Filter
1: Gather Your Arsenal of Tools
Now that you’re sufficiently scared into action, it’s time to gather your tools. You might be thinking, “But wait, I’m not a mechanic!” Fear not, my dear friend, for this task requires no PhD in automotive engineering. In fact, you’ll need just a few basic tools: a new air filter (revolutionary, I know), a screwdriver, and perhaps a pair of gloves if you want to keep those manicured hands of yours pristine. Oh, and a car. You definitely need one of those.
2: Locate the Mysterious Air Filter
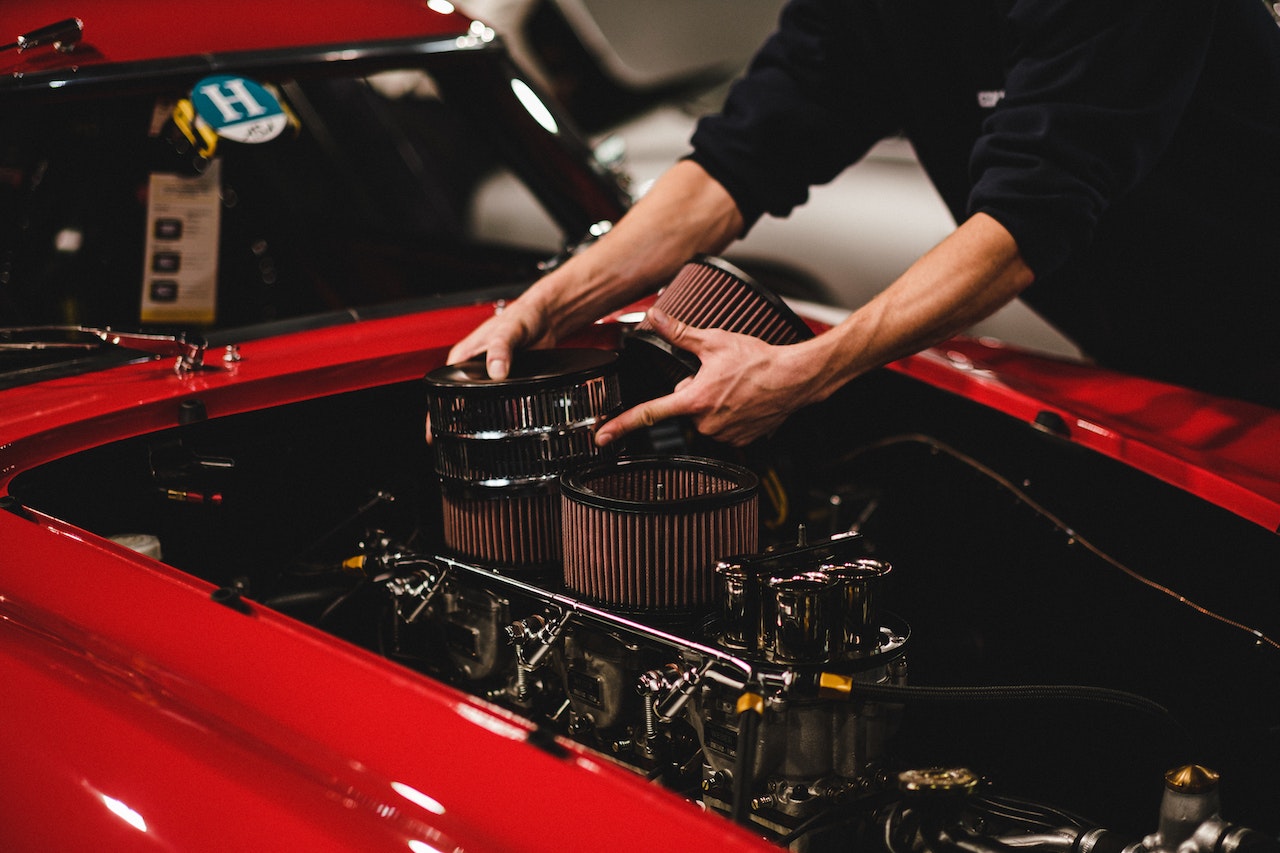
Next up, you’ll need to find where this elusive air filter is hiding. Open the hood of your car (it’s that big button or lever somewhere around your feet – just give it a good yank and something should pop open). Now, prepare yourself. You’re about to see the engine in all its glory. But do not be distracted – you are on a mission. The air filter is typically housed in a black plastic box. It’s not trying to be mysterious; that’s just how it rolls.
3: Unleash the Air Filter from its Plastic Prison
Alright, intrepid mechanic, it’s time to dive in. You’ve located the mystical black box; now it’s time to open it and unleash the air filter from its plastic prison. This will usually involve unscrewing a few screws or unclipping some clips. It’s not rocket science, but if you find yourself wielding a hammer or chainsaw, you’ve probably gone too far. Be gentle; treat it like you would a fragile egg, or the last piece of chocolate in the world. You want to access the air filter, not obliterate it.
Now, gaze upon the air filter. It’s been through a lot, filtering all sorts of airborne villains from entering your car’s delicate engine. It might be grey, it might be brown, it might be a color that hasn’t been discovered yet – whatever the case, if it doesn’t look like the pristine, new filter you’ve just bought, it’s time for it to retire.
4: The Great Swap-a-roo
With the old filter in your hands, it’s time for the grand swap-a-roo. Take your new filter (you did remember to buy a new one, right?) and place it in the exact same spot you just yanked the old one from. This isn’t a time for innovation or creative interpretation; it needs to go back exactly how it was. The right way up, the right way around, just right. Goldilocks would be proud.
But wait! Before you reseal the box and call it a day, take a moment to admire your handiwork. Look at that new filter, sitting there all snug and ready to protect your engine. You’ve just extended the life of your car, reduced emissions, and potentially saved yourself a hefty mechanic bill. Feel the pride swelling in your chest? Good, you’ve earned it.
5: The Grand Finale – Putting Everything Back Together
Now, it’s time to put everything back together. If you’ve followed these incredibly helpful instructions to the letter, this should be as easy as pie (which, for the record, isn’t actually that easy to make, but you get the idea). Resecure the air filter housing with screws or clips, ensuring everything is snug and secure. You wouldn’t want your air filter making a run for it, would you?
Once everything is back in its rightful place, take a step back and admire your work. Look at you, standing there with grease on your hands and a sense of accomplishment in your heart. You’ve just replaced your car’s air filter, and that, my friend, is no small feat.
Conclusion
So here is your guide to replacing your car’s air filter that’s as helpful as it is humorous. You’ve laughed, you’ve learned, and most importantly, you’ve given your car the gift of clean air. So go ahead, take your car for a spin and revel in the knowledge that you’ve done something great today. Just don’t forget to put the hood down first – we wouldn’t want to ruin your victory lap with a minor oversight, now would we?
Pro Tips Extravaganza: Unleash Your Inner Mechanic!
Congratulations! You’ve successfully navigated the treacherous waters of air filter replacement, and you’re almost ready to slap yourself on the back and call it a day. But wait! Don’t ride off into the sunset just yet. Here are some pro tips to ensure your car maintenance adventure is as smooth as a buttered raccoon sliding down a slip ‘n slide.
- Know Your Filter: Not all air filters are created equal. There’s the standard paper filter, the fancy-pants performance filter, and even reusable filters for the eco-warrior in all of us. Make sure you know what your car needs and deserves before making a purchase.
- Check the Filter Box: While you’re in there replacing the filter, give the housing box a quick once-over. Any cracks or damage? That’s like replacing your home’s front door but leaving a gaping hole next to it. Not very secure, is it?
- No Filter? No Problem: Can’t find an air filter that fits? Did the auto parts store clerk laugh in your face? Don’t panic. While it’s not ideal, your car can technically run without an air filter for a short period. Just don’t make a habit of it, or your engine will be inhaling more dirt than a vacuum cleaner.
- The Memory Game: Taking photos of the old filter and its housing before you start can be a game-changer. If you get lost along the way or can’t remember which way the filter goes in, just consult your photo gallery. It’s like having a map when you’re lost in the wilderness of car maintenance.
- Seal the Deal: Ensure that the air filter housing is properly sealed. A poorly sealed air filter housing is like having a security system but leaving your front door wide open. It kind of defeats the purpose.
- Double-Check Your Work: Once everything is back together, give your car a quick start to make sure everything sounds right. Any strange noises or check engine lights? You might need to go back and double-check your work. It’s like baking a cake and forgetting to add sugar – you won’t know you’ve messed up until it’s too late.
FAQ: Your Burning Questions about Car Air Filters
Alas, your air filter is not psychic, but it does give signs when it’s time to retire. Look for reduced fuel efficiency, strange engine sounds, and an unwelcome check engine light. Or, you know, you could just check it every 12,000 to 15,000 miles (19,000 to 24,000 km) like a responsible car owner.
While that pepperoni might look tempting, your car prefers its air filters to be made of actual filter material. Stick to the automotive aisle for this one.
Fear not, mere mortal! Replacing an air filter requires no advanced degrees, just a willingness to get a little dirty and the ability to follow basic instructions. If you can assemble IKEA furniture, you can replace an air filter.
While car demons are exceedingly rare, it’s possible you might have missed a step or two. Go back, check your work, and make sure everything is properly sealed and secure. If the noise persists, it might be time to consult a professional (mechanic, not exorcist).
Sure, if you enjoy living on the edge and hefty mechanic bills. Regular maintenance, including replacing your air filter, keeps your car running smoothly and helps prevent bigger, costlier problems down the road.
Your air filter, while many things, is not aquatic. If it’s wet, it’s a goner. Grab a new one and try to avoid puddles in the future.
Yes, and yes! Many cars have cabin air filters that clean the air inside your car. These should be replaced regularly too, lest you enjoy breathing in dust and other unmentionables.
While a clean air filter can improve your engine’s performance, it’s not going to turn your 2008 minivan into a Formula 1 race car. Manage those expectations, speed racer!
Creative thinking! But air filters are dirty, used-up things and belong in the trash, not as a centerpiece for your dining table. Let’s keep the arts and crafts to clean materials, shall we?
If it’s a disposable filter (which most are), it’s a one-and-done deal — replace it. However, if you’ve got a fancy reusable filter, follow the manufacturer’s cleaning instructions. Just don’t forget, it’s an air filter, not a pet; it doesn’t need a bath.


