Alright, brave soul! You’ve finally decided to tackle the abyss that is your car’s interior. A space that currently looks like a snack shop exploded inside, with a hint of “wet dog” aroma. But fear not, for here’s your fail-proof, not-so-serious-but-actually-serious guide to making your car interior sparkle. Buckle up and let’s dive in!
Step 1: Reality Check
First things first: Acceptance. Admit to yourself that your car has, until now, been a roving testament to your procrastination. It’s okay. We all have our moments. Yours just happens to be a month-long… or year-long moment. But today is the day you break free!
Step 2: Eviction Notice
Start with decluttering. Remove all those empty coffee cups, takeout containers, and that questionable piece of… is that old cheese? Or just a very aged gum? Doesn’t matter. Toss it. And hey, you might even find that earring you lost months ago. Or an entire shoe. Who knows? It’s like a treasure hunt, but with more trash.
Step 3: The Great Vacuuming
Time for the big guns! Vacuum everything. And I mean everything. Seats, carpets, that tiny, nearly inaccessible area between the seats where pens and coins go to die. Remember, your car’s carpet has probably seen more dirt than a politician’s track record, so be thorough.
Pro tip: If your vacuum has attachments, now’s the time to use them. Those little nozzles aren’t just for show. They’re perfect for reaching between seats and other tight spots. If you don’t have a vacuum, just invite a super clean friend over and shame them into doing it for you. (I’m kidding… kind of.)
Step 4: Wipe It Down
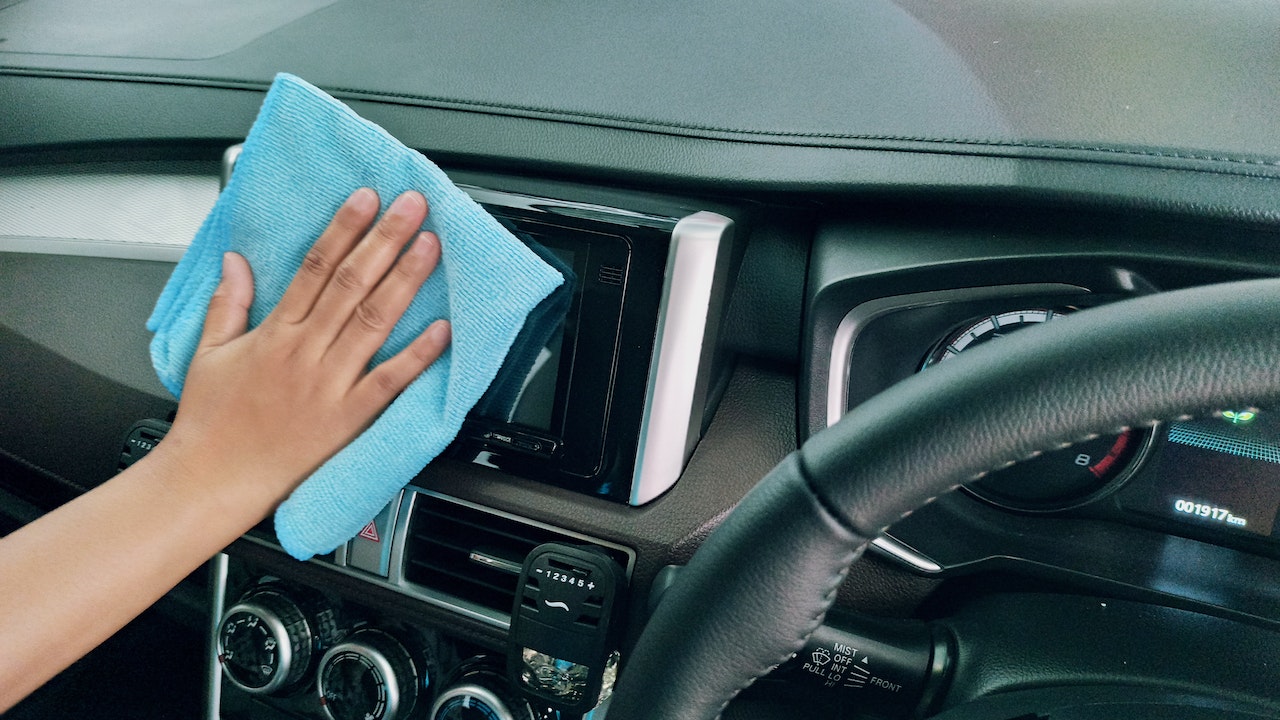
Grab a microfiber cloth and some car interior cleaner. Or just a damp cloth if you’re feeling minimalist. Wipe down the dashboard, steering wheel, center console, door interiors, and every other hard surface. And, for heaven’s sake, remember to dust the air vents. You don’t want to turn on the AC and have a mini dust storm, do you?
Witty warning: Do not, I repeat, do not use aggressive cleaners or bleach. Unless you want your car’s interior to look like a botched tie-dye project.
Step 5: Windows – Let the Sunshine In!
Clean your windows, but not with the streaky moves from your high school dance. No one likes smudged windows. And while we’re here, let’s state the obvious: Use a window cleaner. Not water. Not spit. Not the tears from remembering the cost of your car payments.
Step 6: Seats – Your Bum’s Best Friend
Whether you’ve got leather that’s seen better days or fabric seats that have absorbed one too many spilt lattes, it’s time to show them some love.
- For leather seats: Get a good leather cleaner and conditioner. Wipe them down gently. It’s like giving your car a spa day, but cheaper. And don’t be that person who uses aggressive chemicals. Remember, harsh chemicals on leather are like pouring orange juice over cereal — just wrong.
- For fabric seats: A good fabric cleaner is your bestie here. Spray, let it sit, and then scrub away the memories of that time you tried eating spaghetti while driving. Spoiler alert: It didn’t end well.
Step 7: Nooks, Crannies, and Other Fancy Words
Now, you might think you’re done, but your car has more hidden spots than a cheetah. Delve into the depths of cup holders, the storage pockets on the doors, and that weird compartment thingy you’re not entirely sure about. Q-tips or an old toothbrush can be your weapon of choice to battle the crumbs and debris lurking in these crevices.
Step 8: The Floor Mats: Ground Zero of Grime
These poor things have been stomped on more times than a spider in a panic. Take them out of the car. Shake them like they owe you money. Then vacuum. If they’re rubber or plastic, give them a soapy water bath. If they’re carpeted, a thorough scrub with some carpet cleaner should do the trick.
Step 9: Air Freshening – Not Just Masking Last Tuesday’s Tuna Sandwich
Once everything’s clean, it’s time to address the “aroma.” Ditch the forest worth of pine tree air fresheners hanging from your rear-view mirror. Opt for a subtle, long-lasting car freshener. Alternatively, a small sachet of baking soda tucked away can help absorb any lingering odors. Unless, of course, you’re going for the “Eau de Leftover Takeout” fragrance.
Step 10: Admiration and Bragging Rights
Step back. Admire your handiwork. Snap a picture for social media to prove that you’re an adult who can, in fact, keep things clean. #CarGlowUp
In Conclusion:
There you have it — a squeaky-clean car interior that doesn’t look like a scene from a post-apocalyptic movie. With these steps, not only will your car be cleaner, but you might also just regain the respect of your passengers. Or at least, they won’t be afraid of contracting a new form of fungus from your floor mats. Happy driving, and remember: your car is a vehicle, not a garbage can. Treat it with the love it deserves. Safe (and clean) travels!
Pro Tips To Make Your Car’s Interior Sparkle (And Impress Your In-Laws)
- Coffee Filter Dusting: Believe it or not, coffee filters can double as a dusting tool. They’re lint-free, soft, and cheap — perfect for wiping down screens and glossy surfaces. Bonus: They might even remind you to replenish your caffeine stash.
- Toothpaste for Headlights: Got foggy headlights? A dab of toothpaste can help clear them up. Apply, scrub, rinse. Remember, it’s like brushing your teeth, but for your car.
- Sticky Situations: Spilled something sticky? Ice cubes can be your savior. Place an ice cube over the sticky spot until it hardens and then scrape it off. Just avoid using this method on super sensitive materials.
- Paint Brush Magic: A small paintbrush or makeup brush can help get dirt out of those air vents or intricate designs on the dashboard. It’s like giving your car a mini makeover.
- Hair Conditioner Shine: If your car’s exterior needs a bit of a shine after focusing so much on the interior, wash it and then apply a hair conditioner containing lanolin. It’ll make your car shiny and repellent to water. Your car’s exterior will be so shiny; you might just blind your neighbors.
- Olive Oil Dash: A tiny dab of olive oil can be used to polish your dashboard. Not only will it make it gleam, but you’ll also have the Mediterranean vibes every time you hop in.
- DIY Freshener: Saturate a wooden clothespin in your favorite essential oil and clip it to your air vent. It acts as a natural air freshener every time the air blows. Plus, it’s way fancier than those tree-shaped things.
- Magic Erasers: These handy cleaning pads are not just for walls. They can work wonders on tough interior stains, scuffs, or marks. But be gentle — nobody wants a bald spot on their upholstery.
- Baking Soda Boost: For carpets and upholstery with tough stains or smells, sprinkle some baking soda, let it sit for 20 minutes, then vacuum up. It’s nature’s odor eliminator and can tackle that “What is that smell?” mystery.
- The Power of Baby Wipes: Keep a pack in your glove box. They’re great for quick spill clean-ups, dusting, or wiping sticky fingers before they touch every surface. Because yes, adults can be messy too.
There you go! A few extra hacks to keep your car looking as fresh as the day it rolled off the lot.
FAQs: The Nitty-Gritty of Car Interior Cleaning
Ideally, a quick declutter and wipe-down should be done weekly, especially if you use your car daily. A more thorough cleaning (like the guide above) can be done every 1-2 months. However, if you’ve been living out of your car or have kids turning the backseat into a war zone, you might want to do it more frequently.
While some household cleaners can be safe, many are too harsh for car materials. It’s best to use products specifically designed for car interiors. If in doubt, always spot-test in an inconspicuous area first.
First, check for mold or food remnants under the seats or in pockets. If everything seems clean, try leaving a bowl of baking soda or activated charcoal in the car overnight to absorb odors. Regularly changing cabin air filters can also help.
It depends on the air freshener. Some contain chemicals that you might not want to breathe for extended periods. Consider switching to natural alternatives like essential oils or sachets.
First, don’t panic (too much). Blot — don’t rub — the spill immediately with paper towels or a cloth. Use cold water and a mild detergent to treat the area. If it’s a more challenging stain, like red wine or blood, you might need to consult a professional or use a specific cleaner.
Use sunshades on your windshield when parked in direct sunlight. Consider tinting your windows (where legal) or using UV protective sprays for the dashboard and seats.
It’s wise to work from top to bottom, so you’re not knocking dirt or dust onto areas you’ve already cleaned. Start with the dashboard, move to seats, and end with floor mats and vacuuming.
Yes, but always read the product instructions first. While some leather conditioners can be used on faux leather, others might cause damage or leave a residue.
For leather, try a tiny amount of non-acetone nail polish remover or rubbing alcohol on a cotton swab. For fabric seats, a fabric cleaner or gentle baby wipes might do the trick. Always test in an inconspicuous spot first!
Use seat covers or hammocks designed for pets. Regularly brush and groom your pets to reduce hair and dander. Vacuum frequently and keep some lint rollers handy for quick touch-ups.


